MySQL Workbench Release Notes
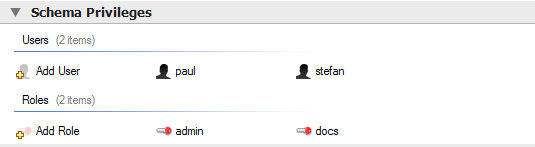
The Schema Privileges panel has the following
sections, used to create users for your schemas and to define
roles:
Users
Roles
The following figure displays the Schema
Privileges section of the MySQL
Model tab.
To add a user, double-click the Add User
icon. This creates a user with the default name
user1. Double-clicking this user opens the
user editor docked at the bottom of the application.
In the User Editor, set the user name and
password using the Name and
Password fields. Assign one role or a
number of roles to the user by selecting the desired roles from
the field on the right and then clicking
. Roles may be revoked by moving them
in the opposite direction.
Right-clicking a user opens a context menu. The items in the menu function as described in Section 9.1.1.5.2, “Adding Roles and Object Privileges”.
To add a role, double-click the
icon. This action creates a role with the default name
role1 in the Roles area
of the Schema Privileges panel and opens
the role editor. The editor has two tabs located at the bottom
of the editor: Role and
Privileges.
To open a context menu with the following actions, right-click an existing role:
: Cuts the role.
: Copies the role.
: Pastes a role from the clipboard. Dimmed if the clipboard is empty.
: Opens the role editor.
: Currently not implemented.
: Currently not implemented.
: Removes the role.
: Currently not implemented.
Role tab.
The Role tab of the role editor includes
the Name field with a default value
consisting of role +
xx is an incremental number
starting at 1). Each role also appears in the
Roles group, which represents the
hierarchical relationship among the defined roles. The
Parent drop-down list enables you to
share the privileges of an existing role with descendent
roles.
To rename a role, double-click the role name to reopen the role editor. Then edit the text in the Name field.
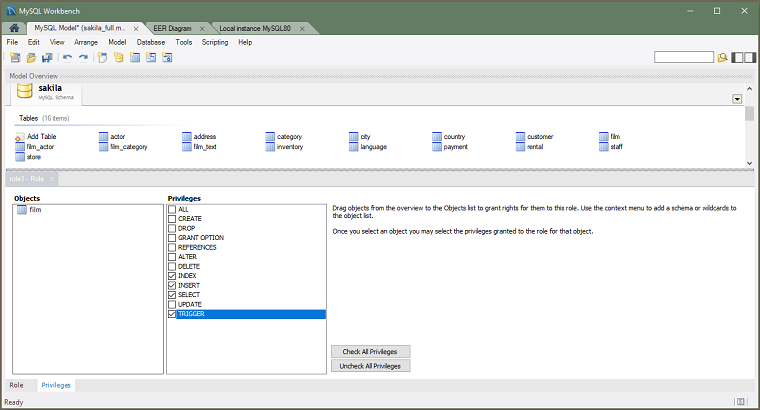
Privileges tab. A newly created role might include the privileges of a parent role. However, if no parent role was provided, the Objects and Privileges groups are empty. To add an object and define privileges for it, drag the object icon from the Schema Privileges panel to the Objects group and then select the object to show a list of valid privileges. Grant an individual privilege by selecting the check box for it or click to select all of the rights.
The following figure shows the film table
object from the sakila schema with
INDEX, INSERT,
SELECT, and TRIGGER
selected for the role1 role.