PDF (US Ltr)
- 4.5Mb
PDF (A4)
- 4.5Mb
You can use Microsoft Access as a front end to MySQL by linking tables within your Microsoft Access database to tables that exist within your MySQL database. When a query is requested on a table within Access, ODBC is used to execute the queries on the MySQL database.
To create a linked table:
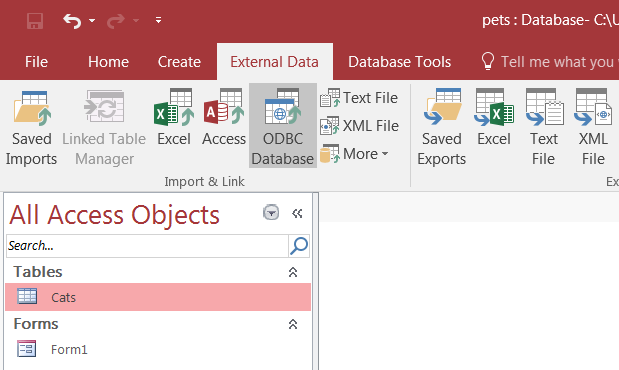
Open the Access database that you want to link to MySQL.
On the tab, choose .
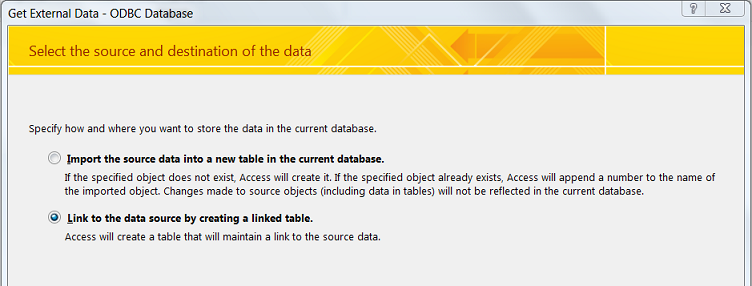
In the
Get External Datadialog box that appears, choose Link to the data source by creating a linked table and click .
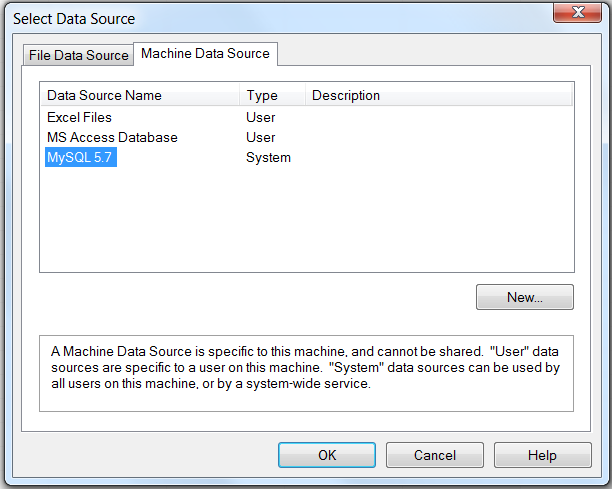
The Select Data Source dialog box appears; it lists the defined data sources for any ODBC drivers installed on your computer. Click either the File Data Source or Machine Data Source tab, and then double-click the Connector/ODBC DSN you want to link your table to. To define a new DSN for Connector/ODBC instead, click and follow the instructions in Section 5.5.3, “Configuring a Connector/ODBC DSN on Windows”; double click the new DSN after it has been created.
If the ODBC data source that you selected requires you to log in, enter your login ID and password (additional information might also be required), and then click .
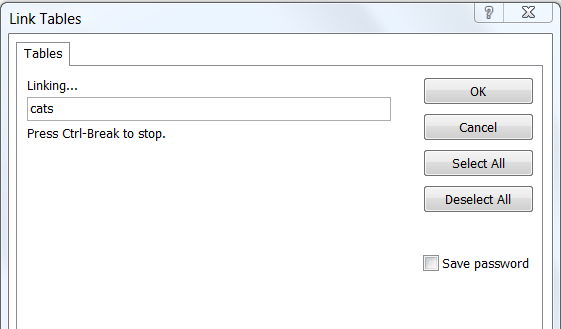
Microsoft Access connects to the MySQL server and displays the list of tables that you can link to. Choose the tables you want to link to (or click ), and then click .
NotesIf no tables show up for you to select, it might be because you did not choose the to connect to when you defined or logged in to the DSN. Reconfigure the DSN and specify the Database to connect to (see Section 5.5.3, “Configuring a Connector/ODBC DSN on Windows” for details), or choose a Database when you log in to the DSN.
If your database on Access already has a table with the same name as the one you are linking to, Access will append a number to the name of the new linked table.
If Microsoft Access is unable to determine the unique record identifier for a table automatically, it will ask you to choose a column (or a combination of columns) to be used to uniquely identify each row from the source table. Select the column[s] to use and click .

Once the process has been completed, you can build interfaces and queries to the linked tables just as you would for any Access database.
Use the following procedure to view links or to refresh them when the structures of the linked tables have changed.
To view or refresh links:
Open the database that contains links to MySQL tables.
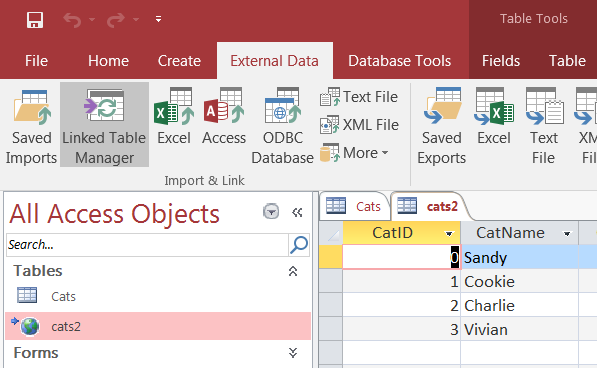
On the tab, choose .
The Linked Table Manager appears. Select the check box for the tables whose links you want to refresh. Click to refresh the links.
If the ODBC data source requires you to log in, enter your login ID and password (additional information might also be required), and then click .
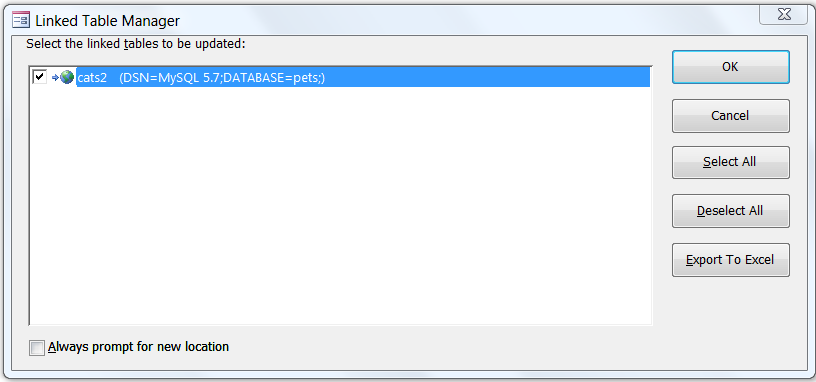
Microsoft Access confirms a successful refresh or, if the tables are not found, returns an error message, in which case you should update the links with the steps below.
To change the path for a set of linked tables (for pictures of the GUI dialog boxes involved, see the instructions above for linking tables and refreshing links) :
Open the database that contains the linked tables.
On the tab, choose .
In the that appears, select the Always Prompt For A New Location check box.
Select the check box for the tables whose links you want to change, and then click .
The Select Data Source dialog box appears. Select the new DSN and database with it.