PDF (US Ltr)
- 4.5Mb
PDF (A4)
- 4.5Mb
Important
Make sure that the information that you are exporting to the MySQL table is valid for the corresponding MySQL data types. Values that are valid within Access but are outside of the supported ranges of the MySQL data types may trigger an “overflow” error during the export.
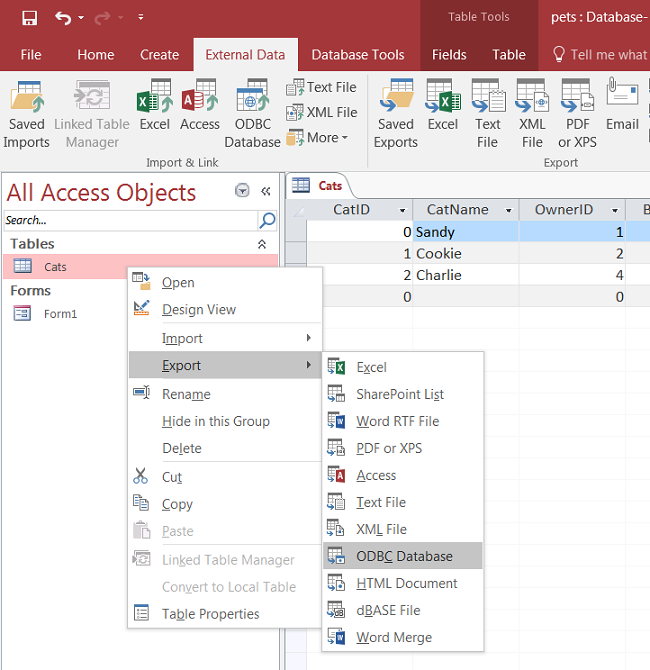
To export a table of data from an Access database to MySQL, follow these instructions:
With an Access database opened, the navigation plane on the right should display, among other things, all the tables in the database that are available for export (if that is not the case, adjust the navigation plane's display settings). Right click on the table you want to export, and in the menu that appears, choose , .
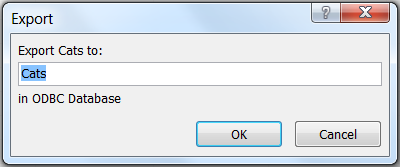
The Export dialog box appears. Enter the desired name for the table after its import into the MySQL server, and click .
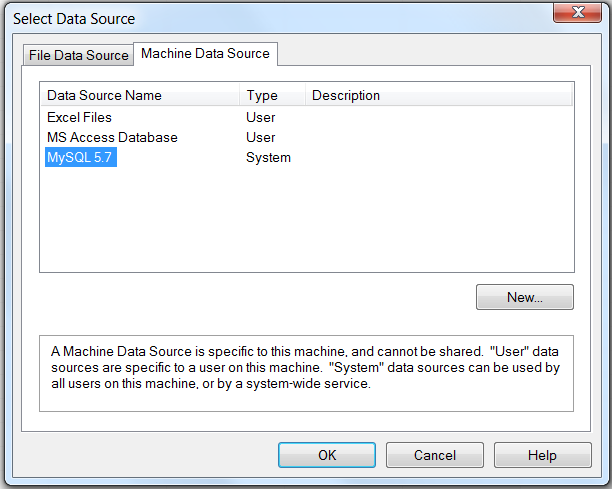
The Select Data Source dialog box appears; it lists the defined data sources for any ODBC drivers installed on your computer. Click either the File Data Source or Machine Data Source tab, and then double-click the Connector/ODBC DSN to which you want to export your table. To define a new DSN for Connector/ODBC instead, click and follow the instructions in Section 5.5.3, “Configuring a Connector/ODBC DSN on Windows”; double click the new DSN after it has been created.
If the ODBC data source that you selected requires you to log in, enter your login ID and password (additional information might also be required), and then click .
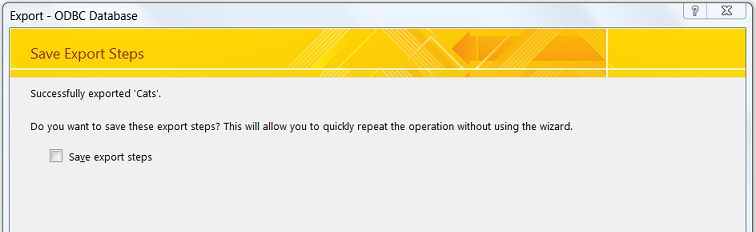
A dialog box appears with a success message if the export is successful. In the dialog box, you can choose to save the export steps for easy repetitions in the future.
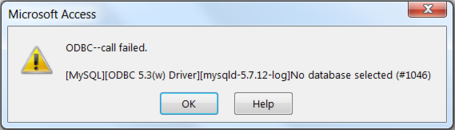
NoteIf you see the following error message instead when you try to export to the Connector/ODBC DSN, it means you did not choose the to connect to when you defined or logged in to the DSN. Reconfigure the DSN and specify the Database to connect to (see Section 5.5.3, “Configuring a Connector/ODBC DSN on Windows” for details), or choose a Database when you log in to the DSN .