PDF (US Ltr)
- 4.5Mb
PDF (A4)
- 4.5Mb
To import tables from MySQL to Access, follow these instructions:
Open the Access database into which that you want to import MySQL data.
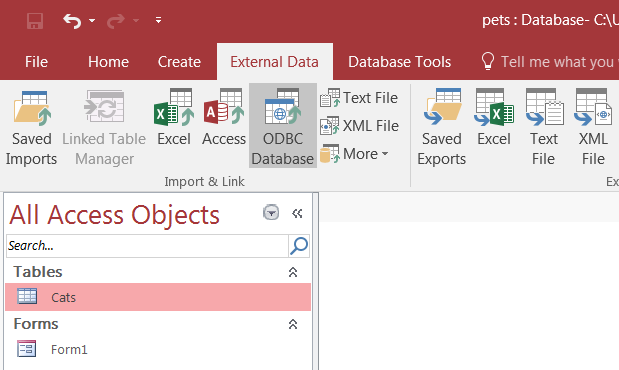
On the tab, choose .
In the
Get External Datadialog box that appears, choose Import the source data into a new table in the current database and click .
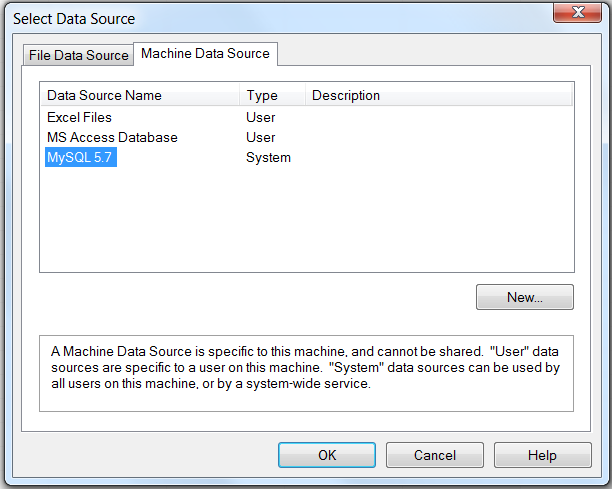
The Select Data Source dialog box appears. It lists the defined data sources for any ODBC drivers installed on your computer. Click either the File Data Source or Machine Data Source tab, and then double-click the Connector/ODBC DSN from which you want to import your table. To define a new DSN for Connector/ODBC instead, click and follow the instructions in Section 5.5.3, “Configuring a Connector/ODBC DSN on Windows”; double click the new DSN after it has been created.
If the ODBC data source that you selected requires you to log in, enter your login ID and password (additional information might also be required), and then click .
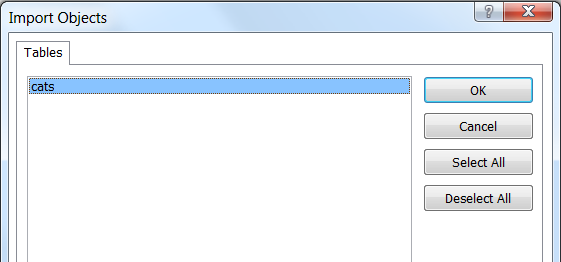
Microsoft Access connects to the MySQL server and displays the list of tables (objects) that you can import. Select the tables you want to import from this Import Objects dialog (or click ), and then click .
NotesIf no tables show up for you to select, it might be because you did not choose the to connect to when you defined or logged in to the DSN. Reconfigure the DSN and specify the Database to connect to (see Section 5.5.3, “Configuring a Connector/ODBC DSN on Windows” for details), or choose a Database when you log in to the DSN .
If your Access database already has a table with the same name as the one you are importing, Access will append a number to the name of the imported table.
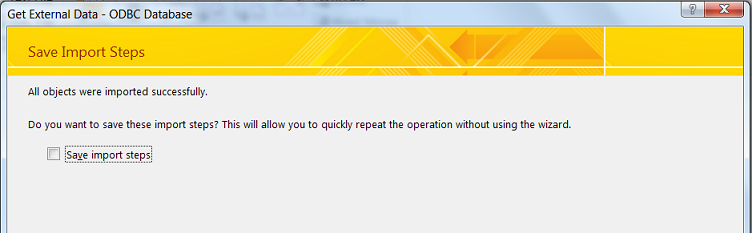
A dialog box appears with a success message if the import is successful. In the dialog box, you can choose to save the import steps for easy repetitions in the future.