MySQL Workbench Release Notes
The Indexes subtab contains all of the index
information for your table. Use this subtab to add, drop, and
modify indexes. The following figure shows an example of the
layout with the PRIMARY index of the
customer table selected and both the index
columns and index options shown.
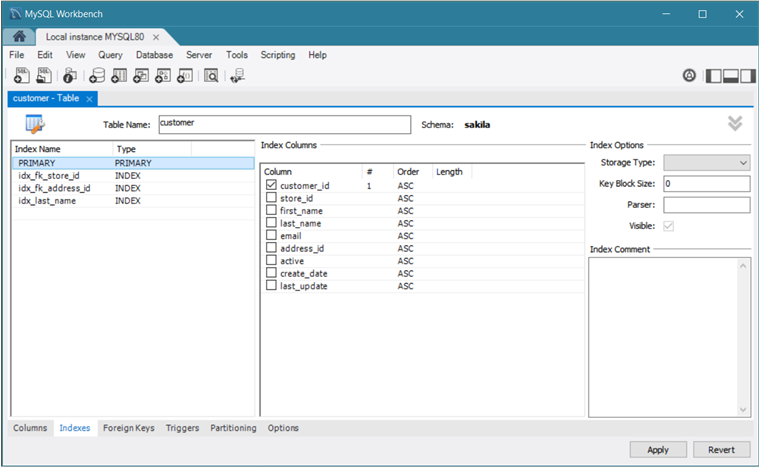
All indexes for a table are listed by index name. Click an index name to display the Index Columns section with information about the selected index. In addition, you can configure the storage type, key block size, parser, and the visibility of the index. Index comments, when added, apply to the selected index only.
The actions available from this subtab include:
To add an index, click the last row in the index list. Enter a name for the index and select the index type from the list. Select the column or columns that you wish to index by checking the column name in the Index Columns list. You can remove a column from the index by removing the check mark from the appropriate column.
To specify the order of a column within an index, select
ASCorDESCfrom the Order column. Create an index prefix by specifying a numeric value under theLengthcolumn. You cannot enter a prefix value for fields that have a data type that does not support prefixing.To render a secondary index (an index other than the primary key or a unique column) invisible to the optimizer, deselect the Visible option. By default, all indexes are visible. This feature must be supported by the active server; otherwise, the Visible check box is grayed out. For a description of the usage patterns for this option, see Invisible Indexes.
To drop an index, right-click the index name and then click the menu item.