PDF (US Ltr)
- 4.5Mb
PDF (A4)
- 4.5Mb
In this tutorial you create an ASP.NET web page that binds LINQ queries to entities using the Entity Framework mapping with MySQL Connector/NET.
If you have not already done so, install the
world database sample prior to attempting this
tutorial. See the tutorial
Section 4.6.3, “Tutorial: Using an Entity Framework Entity as a Windows Forms Data
Source”
for instructions on downloading and installing this database.
Creating an ASP.NET Website
In this part of the tutorial, you create an ASP.NET website. The
website uses the world database. The main web
page features a drop-down list from which you can select a country.
Data about the cities of that country is then displayed in a
GridView control.
From the Visual Studio main menu select , , and then .
From the Visual Studio installed templates select ASP.NET Web Site. Click . You will be presented with the Source view of your web page by default.
Click the Design view tab situated underneath the Source view panel.
In the Design view panel, enter some text to decorate the blank web page.
Click Toolbox. From the list of controls, select DropDownList. Drag and drop the control to a location beneath the text on your web page.
From the DropDownList control context menu, ensure that the Enable AutoPostBack check box is enabled. This will ensure the control's event handler is called when an item is selected. The user's choice will in turn be used to populate the GridView control.
From the Toolbox select the GridView control. Drag and drop the GridView control to a location just below the drop-down list you already placed.
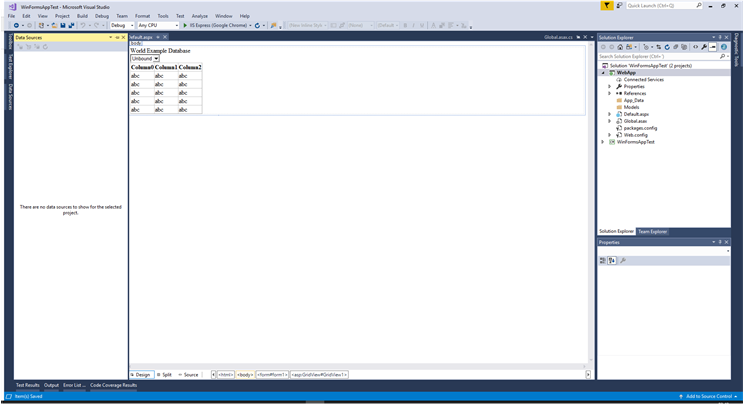
The following figure shows an example of the decorative text and two controls in the Design view tab. The added GridView control produced a grid with three columns (
Column0,Column1, andColumn3) and the stringabcin each cell of the grid.At this point it is recommended that you save your solution, and build the solution to ensure that there are no errors.
If you run the solution you will see that the text and drop down list are displayed, but the list is empty. Also, the grid view does not appear at all. Adding this functionality is described in the following sections.
At this stage you have a website that will build, but further
functionality is required. The next step will be to use the Entity
Framework to create a mapping from the world
database into entities that you can control programmatically.
Creating an ADO.NET Entity Data Model
In this stage of the tutorial you will add an ADO.NET Entity Data
Model to your project, using the world database
at the storage level. The procedure for doing this is described in
the tutorial
Section 4.6.3, “Tutorial: Using an Entity Framework Entity as a Windows Forms Data
Source”,
and so will not be repeated here.
Populating a List Box by Using the Results of a Entity LINQ Query
In this part of the tutorial you will write code to populate the DropDownList control. When the web page loads the data to populate the list will be achieved by using the results of a LINQ query on the model created previously.
In the Design view panel, double-click any blank area. This brings up the
Page_Loadmethod.Modify the relevant section of code according to the following listing example.
...
public partial class _Default : System.Web.UI.Page
{
    worldModel.worldEntities we;

    protected void Page_Load(object sender, EventArgs e)
    {
        we = new worldModel.worldEntities();

        if (!IsPostBack)
        {
            var countryQuery = from c in we.country
                               orderby c.Name
                               select new { c.Code, c.Name };
            DropDownList1.DataValueField = "Code";
            DropDownList1.DataTextField = "Name";
            DropDownList1.DataSource = countryQuery.ToList();
            DataBind();
        }
    }
...
The list control only needs to be populated when the page first loads. The conditional code ensures that if the page is subsequently reloaded, the list control is not repopulated, which would cause the user selection to be lost.
Save the solution, build it and run it. You should see that the list control has been populated. You can select an item, but as yet the GridView control does not appear.
At this point you have a working Drop Down List control, populated by a LINQ query on your entity data model.
Populating a Grid View Control by Using an Entity LINQ Query
In the last part of this tutorial you will populate the Grid View Control using a LINQ query on your entity data model.
In the Design view, double-click the DropDownList control. This action causes its
SelectedIndexChangedcode to be displayed. This method is called when a user selects an item in the list control and thus generates an AutoPostBack event.Modify the relevant section of code accordingly to the following listing example.
...
    protected void DropDownList1_SelectedIndexChanged(object sender, EventArgs e)
    {
        var cityQuery = from c in we.city
                        where c.CountryCode == DropDownList1.SelectedValue
                        orderby c.Name
                        select new { c.Name, c.Population, c.CountryCode };
        GridView1.DataSource = cityQuery;
        DataBind();
    }
...
The grid view control is populated from the result of the LINQ query on the entity data model.
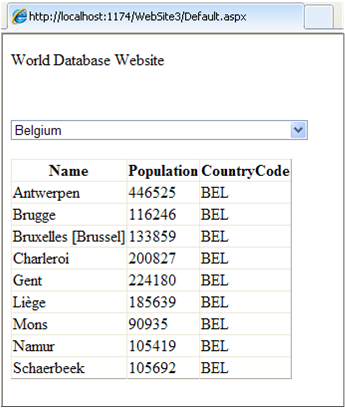
Save, build, and run the solution. As you select a country you will see its cities are displayed in the GridView control. The following figure shows Belgium selected from the list box and a table with three columns:
Name,Population, andCountryCode.
In this tutorial you have seen how to create an ASP.NET website, you have also seen how you can access a MySQL database using LINQ queries on an entity data model.