MySQL Connector/ODBC Release Notes
Crystal Reports can use an ODBC DSN to connect to a database from which you to extract data and information for reporting purposes.
Note
There is a known issue with certain versions of Crystal Reports where the application is unable to open and browse tables and fields through an ODBC connection. Before using Crystal Reports with MySQL, please ensure that you have update to the latest version, including any outstanding service packs and hotfixes. For more information on this issue, see the Business) Objects Knowledgebase for more information.
For example, to create a simple crosstab report within Crystal Reports XI, follow these steps:
-
Create a DSN using the
Data Sources
            (ODBC)
tool. You can either specify a complete database, including user name and password, or you can build a basic DSN and use Crystal Reports to set the user name and password.For the purposes of this example, a DSN that provides a connection to an instance of the MySQL Sakila sample database has been created.
Open Crystal Reports and create a new project, or an open an existing reporting project into which you want to insert data from your MySQL data source.
-
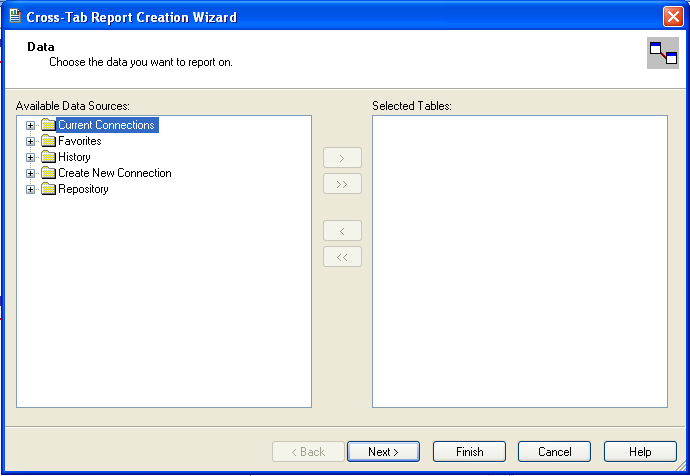
Start the Cross-Tab Report Wizard, either by clicking the option on the Start Page. Expand the Create New Connection folder, then expand the ODBC (RDO) folder to obtain a list of ODBC data sources.
You will be asked to select a data source.
-
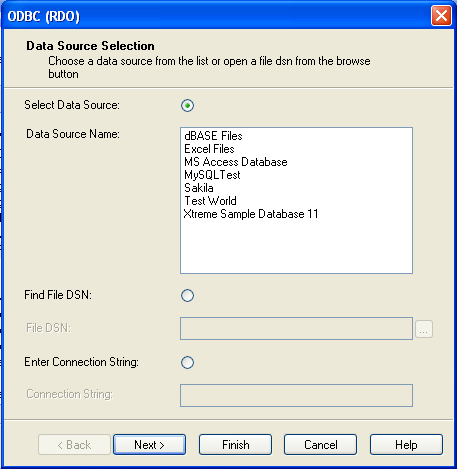
When you first expand the ODBC (RDO) folder you will be presented the Data Source Selection screen. From here you can select either a pre-configured DSN, open a file-based DSN or enter and manual connection string. For this example, the pre-configured Sakila DSN will be used.
If the DSN contains a user name/password combination, or you want to use different authentication credentials, click to enter the user name and password that you want to use. Otherwise, click to continue the data source selection wizard.
-
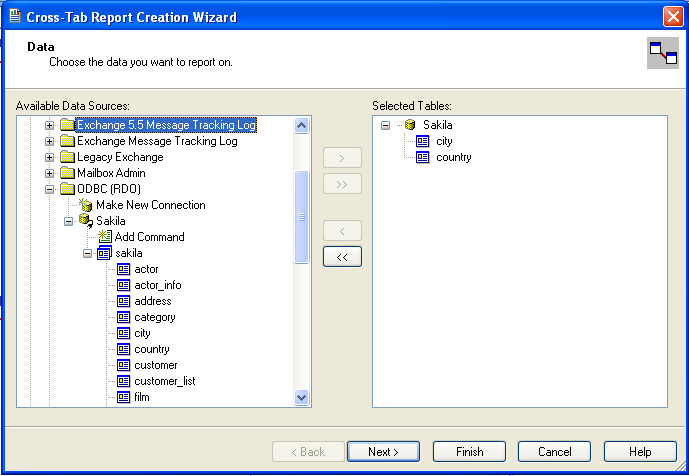
You will be returned the Cross-Tab Report Creation Wizard. You now need to select the database and tables that you want to include in your report. For our example, we will expand the selected Sakila database. Click the
citytable and use the button to add the table to the report. Then repeat the action with thecountrytable. Alternatively you can select multiple tables and add them to the report.Finally, you can select the parent Sakila resource and add of the tables to the report.
Once you have selected the tables you want to include, click to continue.
-
Crystal Reports will now read the table definitions and automatically identify the links between the tables. The identification of links between tables enables Crystal Reports to automatically lookup and summarize information based on all the tables in the database according to your query. If Crystal Reports is unable to perform the linking itself, you can manually create the links between fields in the tables you have selected.
Click to continue the process.
-
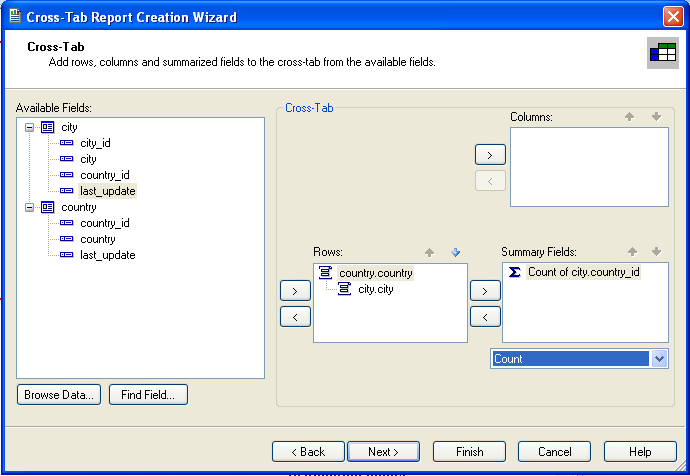
You can now select the columns and rows that to include within the Cross-Tab report. Drag and drop or use the buttons to add fields to each area of the report. In the example shown, we will report on cities, organized by country, incorporating a count of the number of cities within each country. If you want to browse the data, select a field and click the button.
Click to create a graph of the results. Since we are not creating a graph from this data, click to generate the report.
-
The finished report will be shown, a sample of the output from the Sakila sample database is shown below.


Once the ODBC connection has been opened within Crystal Reports, you can browse and add any fields within the available tables into your reports.