The backup-recovery wizard is used to restore MySQL Enterprise Backup data. For more information about creating a backup using MySQL Workbench, see Section 6.7.2, “Online Backup”.
The wizard enables you to restore a backup from a folder, an image file, or from a backup profile. Before attempting to restore MySQL data from a backup to a target server, remove all of the files in the data directory of that server.
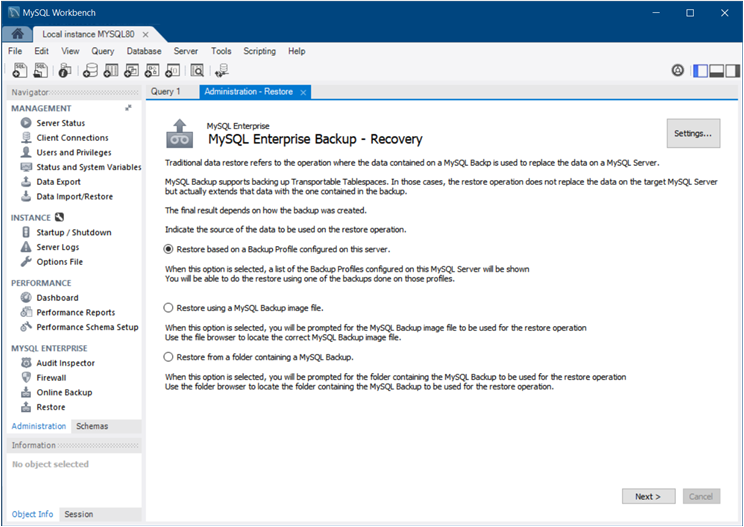
With an active MySQL connection tab open, select from the menu to open the wizard in the current tab. As the following figure shows, you must first select the source of data to use for the recovery.
Select one of the following source options and then click to continue:
-
Restore based on a Backup Profile configured on this server.
This option enables you to choose from one of the existing MySQL Enterprise Backup profiles. For information about configuring a profile, see Section 6.7.2, “Online Backup”.
-
Restore using a MySQL Backup image file.
This option opens the default file browser to assist you with locating a backup image file to restore.
-
Restore from a folder containing a MySQL Backup.
This option opens the default file browser to search for a backup folder.
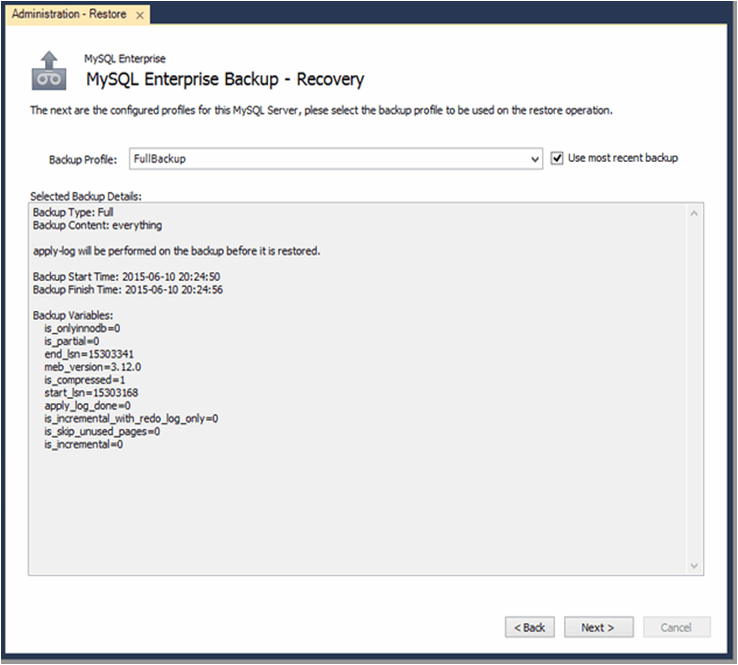
For example, if the backup profile option was selected as a data
source type in the wizard, the next step provides a list of
existing profiles from which to choose. The following figure shows
this wizard step with the FullBackup profile
selected and the Use most recent backup
option enabled to ensure that only the latest content is included.
The wizard also shows the specific details of the selected
profile, such as the backup type, content, start and finish time,
and the backup variables.
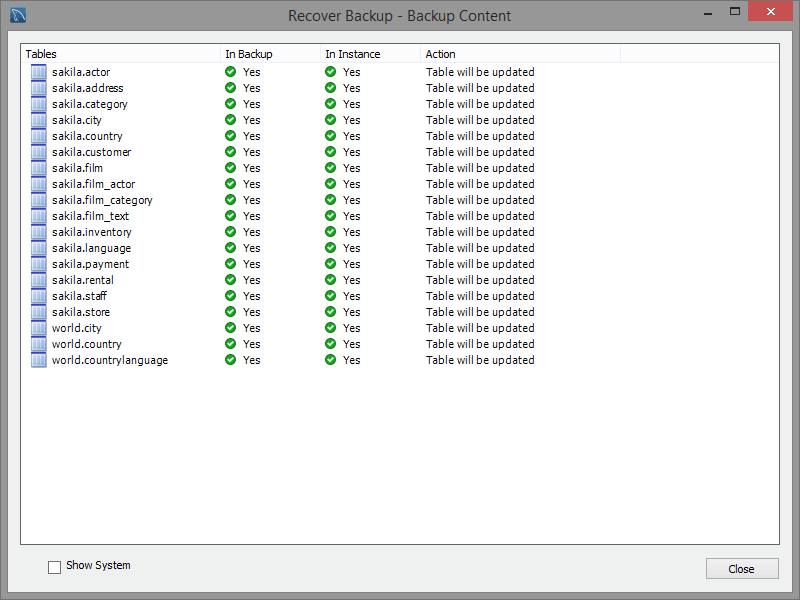
The next step provides the option, which lists the content to be restored. For example, the following figure shows a set of sakila database tables, whether each table is in the backup and in the MySQL instance, and the action to be performed by the wizard.
The Show System check box toggles internal
schemas from view, schemas such as the internal
performance_schema and
mysql tables.
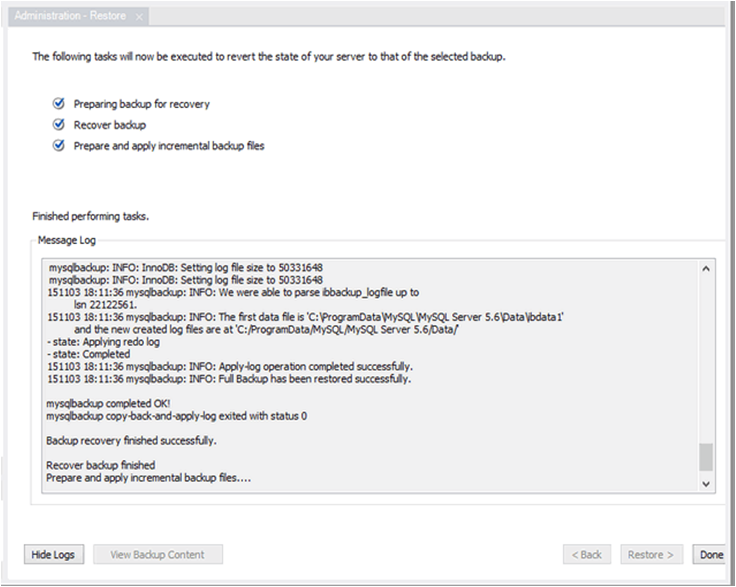
After verifying the content and closing the content view, click to execute the restoration process and to toggle the message logs as shown in the following figure.


