This wizard helps create SSL certificates for both MySQL clients
and MySQL servers. Connections in MySQL Workbench are updated with the
certificates by the wizard. This wizard requires OpenSSL to create
the certificates. An example MySQL configuration file
(my.cnf / my.ini) is
also generated that utilizes the generated certificates.
The OpenSSL binary should be in the system's PATH.
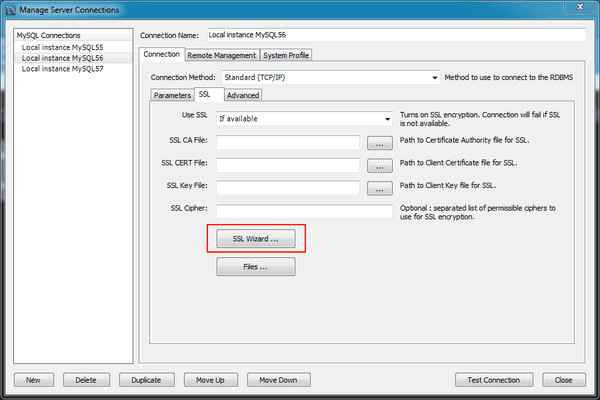
Start the SSL wizard from the SSL tab of a MySQL server connection. Locate this tab in the MySQL connection editor. Click to execute the wizard, as the following figure shows.
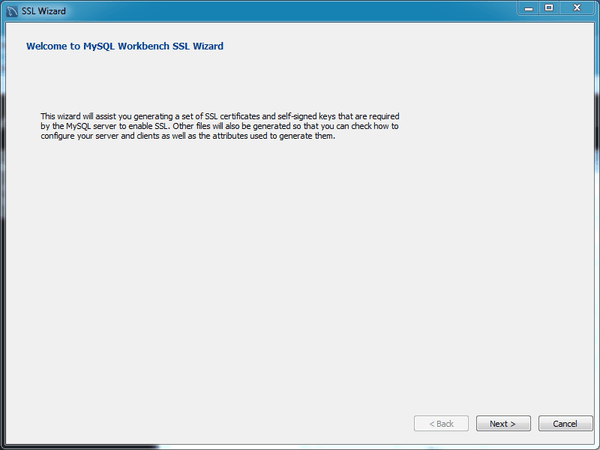
Read the informative text on the welcome screen (displayed in the following figure), and then click .
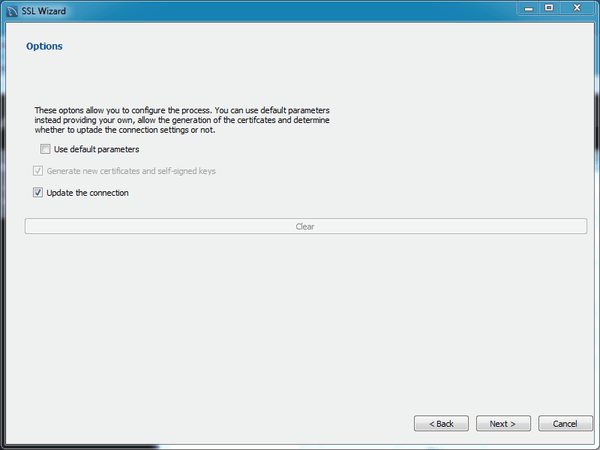
Check the options that apply. The following figure shows an example of the available options.
Use default parameters: Check this to skip entering the optional attributes, such as Country, State, Organization, and so on. By default, these fields are empty.
Generate new certificates and self-signed keys: Check this to generate new files, otherwise the existing files are used. You might disable this if you already generated SSL certificates but forgot where the files are located, or how to configure them.
Update the connection: Updates the defined MySQL connection (in MySQL Workbench) with the generated certificate information.
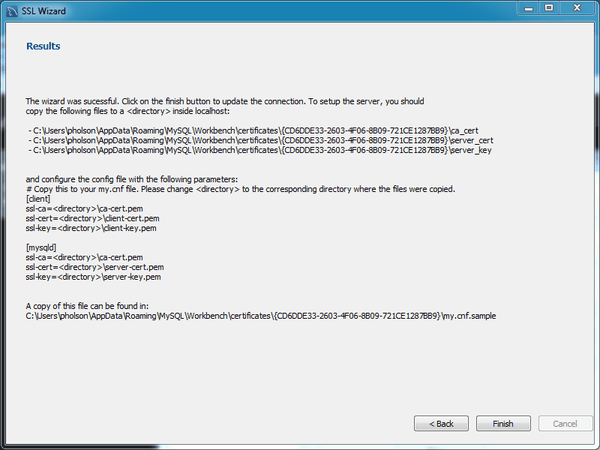
The results page describes the generated files, and provides
requirements that you must perform to complete the operation. For
example, you must manually edit your MySQL configuration file
(my.ini or my.cnf) and
define the SSL options.
The following figure shows an example Results screen. Consider leaving this screen open, and close it after you copied the files and altered your MySQL configuration file to enable SSL connections. The wizard does not perform these actions for you.
Here an example process of using the generated SSL files to set up an SSL connection. Adjust your paths as they will be different.
Create a directory to store the certificate files. In this simple example, MySQL Workbench is installed on the same host as the MySQL Server, and we created "
C:\certs" on the system.-
Copy and paste the results to a new (temporary) file, but change <directory> to the path (
C:\certs) we created. For example:[client] ssl-ca=C:\certs\ca-cert.pem ssl-cert=C:\certs\client-cert.pem ssl-key=C:\certs\client-key.pem [mysqld] ssl-ca=C:\certs\ca-cert.pem ssl-cert=C:\certs\\server-cert.pem ssl-key=C:\certs\\server-key.pemWarningMySQL interprets "\s" as a space, so we added an extra backslash to escape it. That is why you see "\\server-key.pem" in the above example, because MySQL Server would interpret "\server-key.pem" as " erver-key.pem".
-
Open the MySQL Server configuration file. In this example, its location is "
C:\ProgramData\MySQL\MySQL Server 5.7\my.ini".NoteThe location of your configuration file depends on how MySQL Server was installed. The connection editor defines and displays its location, as does the Options File page in MySQL Workbench.
-
Add the client certificate information under the
[client]section:[client] ssl-ca=C:\certs\ca-cert.pem ssl-cert=C:\certs\client-cert.pem ssl-key=C:\certs\client-key.pemAdd the server certificate information under the
[mysqld]section:[mysqld] ssl-ca=C:\certs\ca-cert.pem ssl-cert=C:\certs\\server-cert.pem ssl-key=C:\certs\\server-key.pem Update the paths to the SSL client certificates in your MySQL connection, under the SSL tab. There are three paths to update.
Restart the MySQL Server. In the log, you should see something like "Warning CA certificate
C:\certs\ca-cert.pemis self signed."In the MySQL connection editor, clicking should confirm your SSL connection.
Additionally, consider setting Use SSL to "Required". Or, if you are experiencing problems, set it to "If available" while debugging the problem.


