In this tutorial, we are going to guide you through the process of preparing and configuring an Ubuntu mini host for InnoDB cluster usage.
To create a cluster with tolerance to one failure, we need three instances. So we’re going to create and configure a Virtual Machine and clone it two times.
Please download the following products to get started:
Once the download of VirtualBox is finished, please install it. The Ubuntu Mini iso installation and configuration is going to be described further in this tutorial.
Note: The screenshots for this tutorial were taken from Windows 10
Configuring VirtualBox
Start VirtualBox once the installation is complete. Click on the “New” button to create a new virtual machine and select “Linux” as the operating system. As for “Version”, please select Ubuntu (32-bit) or Ubuntu (64-bit), depending on the version downloaded. Click “Next”.

In the following screen, you can set the amount of RAM that you want to assign to the virtual machine. By default, 1Gb is assigned (1024Mb) and is enough.

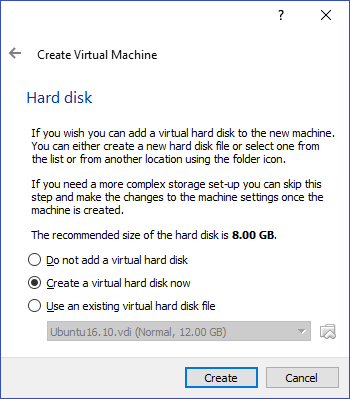
Next, you have the option to configure how you want to add a hard disk to the virtual machine, for this tutorial we will use a virtual hard disk.
Now select the hard disk file type for your virtual disk. We will use VDI.

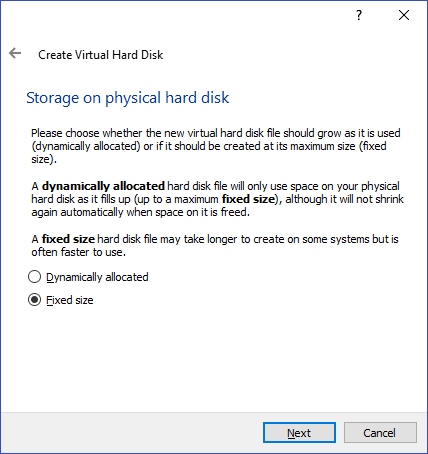
In this screen, you can select a fixed size to your virtual disk or to let VirtualBox increase the size dynamically based on the usage of the virtual machine. For this tutorial, we are not going to require much space, so the “Fixed size” option is selected.
In the following screen, you can set a name for your virtual hard drive file as well as where it will be saved. The size by default is set to 8Gb. Click on “Create” once you do your selection.

A message dialog shall appear with the virtual disk creation progress. When completed, the main VirtualBox window shall appear, select the virtual machine you just created and then click on the “Settings” button.
Select the “Network” option and change the configuration of the network adapter. By default, the adapter is attached to “NAT” but we are going to change it to “Bridge Adapter”. By having a “bridge Adapter” we ensure that the host and the guest (virtual machine) are going to be on the same network and visible to each other. In the “Name” option, select the adapter type that you are using to access the internet: Ethernet or Wireless.

Now select the “Storage” option. In this section under “Controller IDE” click on “Empty”, then in the right panel click on the disc icon to open the explorer. Select the Ubuntu mini.iso image that you downloaded previously.

Click on the “System” option to change the booting order. In the “Boot Order” section, uncheck the “Floppy” option and move “Hard Disk” as the first option to boot and “Optical” as the second option. This configuration is just to prevent that when the virtual machine reboots it doesn’t start form the iso file.

Click “Ok” to save the changes, and finish the virtual machine configuration.
Install Ubuntu
In the VirtualBox window, select the virtual machine and then click on the “Start” option. The menu for the Ubuntu installer shall appear, select the “install” option.

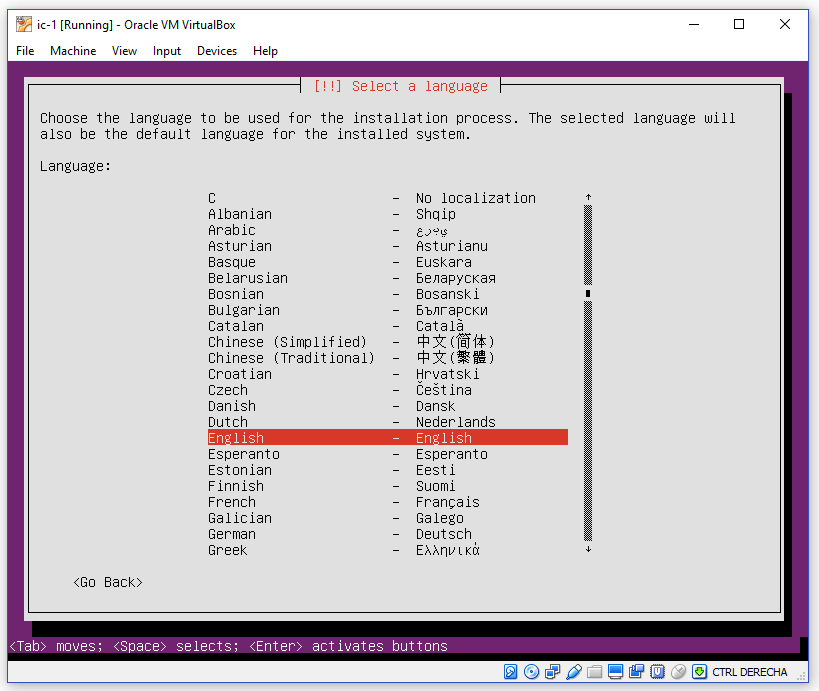
To start with the installation, you need to choose the language that is going to be in use through the process. English is the language used in this blog tutorial.
Then you will be asked to select your location, and the encoding for the keyboard used in the process. Select the adequate configuration for you.
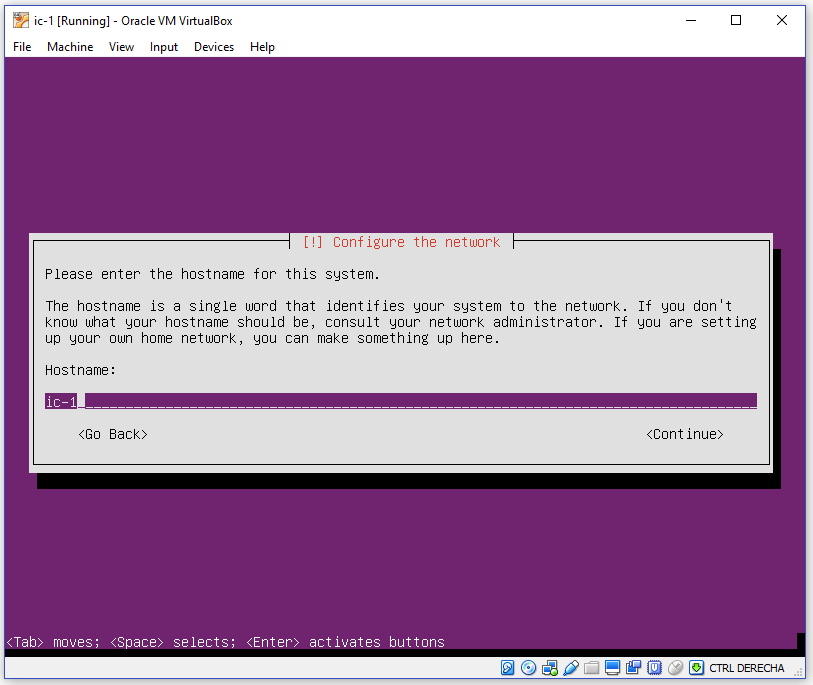
To continue you need to set a name for the host.
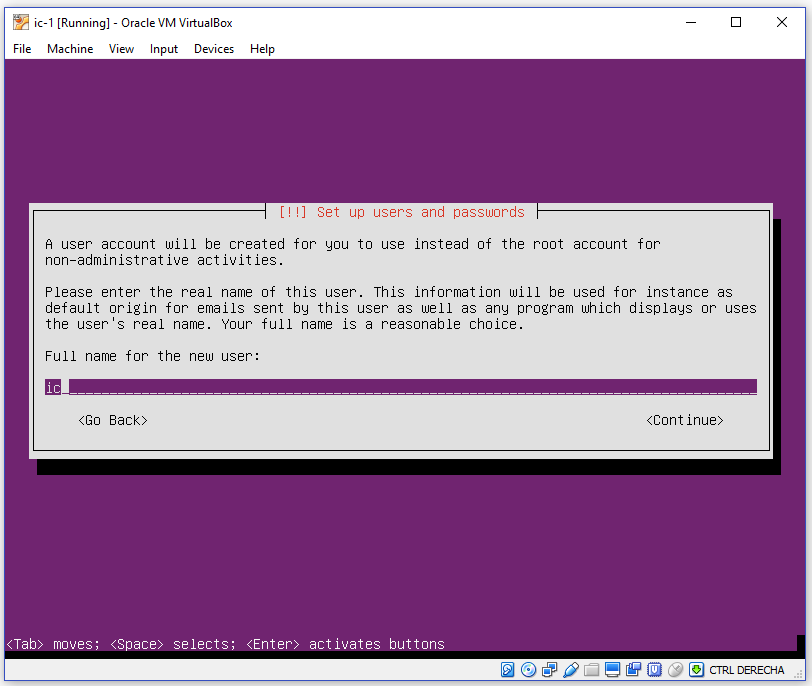
In the next screen, select the mirror for the updates. Then you need to set the full name for your account.
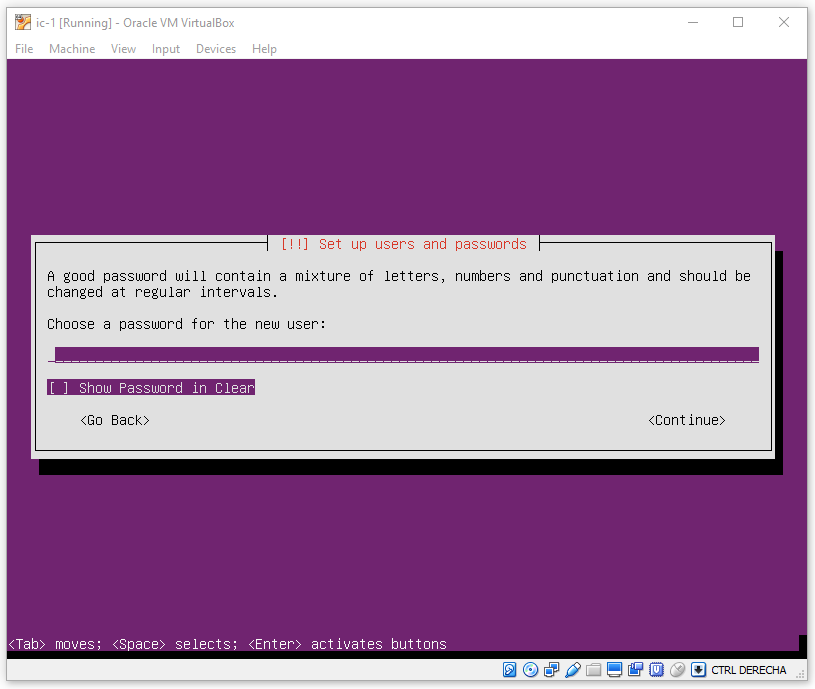
And then the username and password for your account.

After, you can choose to encrypt your home directory if you’d like and set the date and time for the host. When the date and time configuration is completed you need to choose a partition method for the installation.

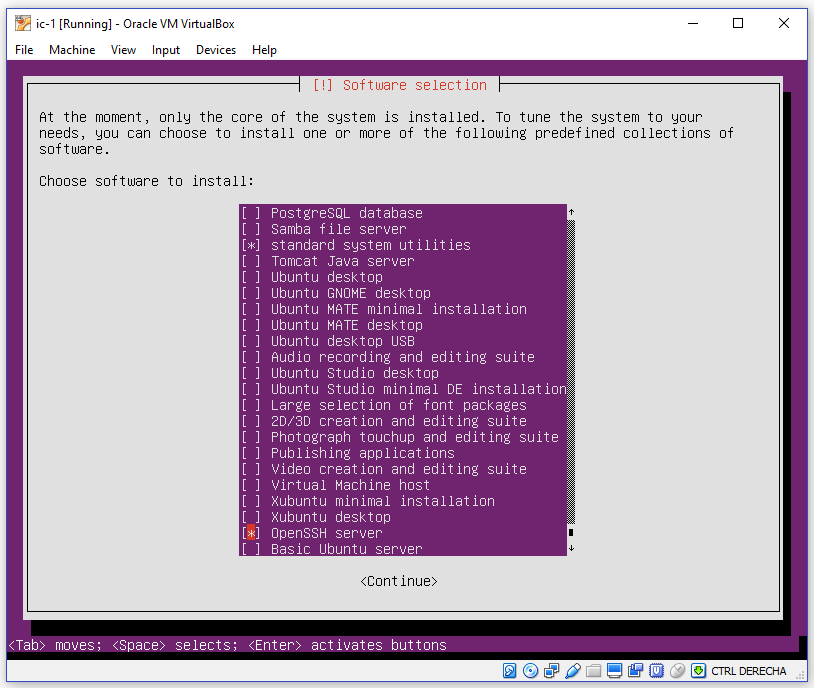
Next, you need to select an option to apply updates to the virtual machine. To continue you can select any extra software to be installed on the virtual machine, select the “Open SSH Server” option and press the space bar to check it, press enter to continue.
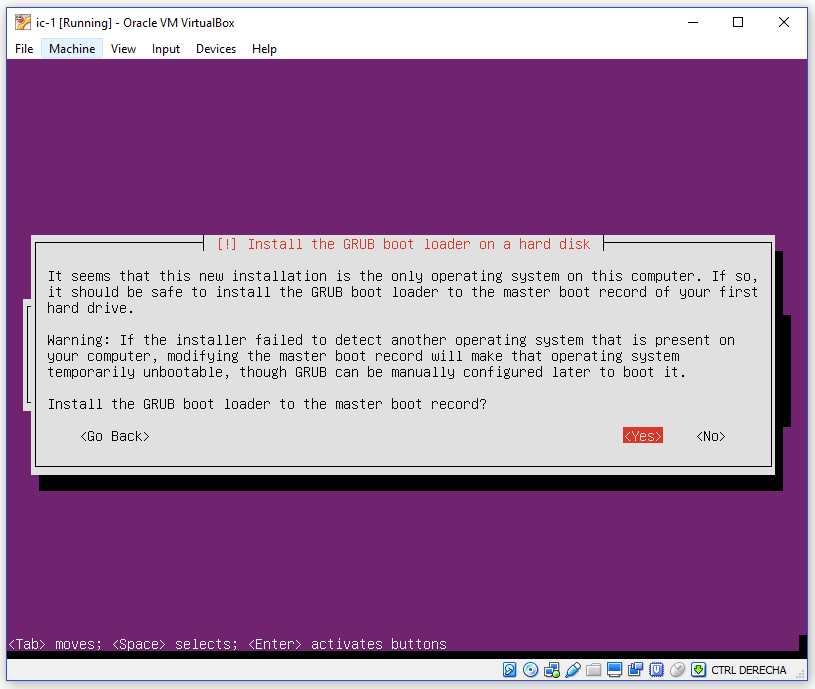
Later you will be asked to install GRUB boot loader, select yes.
Also, you will be asked if you want to set the system clock to UTC, choose the option that you think is the best for you.
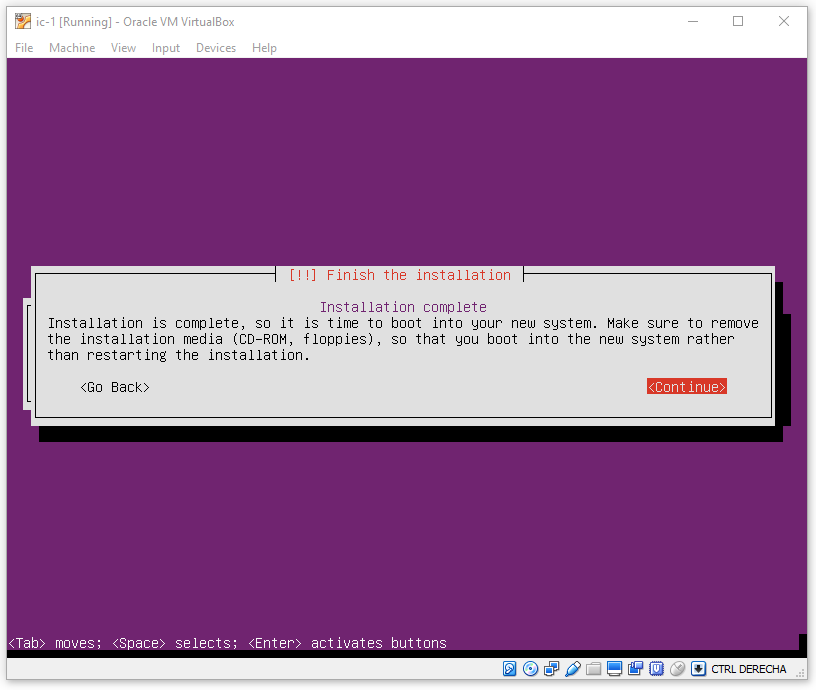
Once the installation finishes, the system will need to reboot. Select the “Continue” option and press enter to reboot the virtual machine.
Configuring the Virtual Machine
Once the reboot is complete, type the user name created and its password to log in. Then do the following steps:
Install Python
|
1 |
$ sudo apt-get install python |
Install MySQL APT repository
|
1 2 |
$ sudo wget http://dev.mysql.com/get/mysql-apt-config_0.8.4-1_all.deb $ sudo dpkg -i ./mysql-apt-config_0.8.4-1_all.deb |
And update the apt repositories:
|
1 |
$ sudo apt-get update |
Install MySQL Server and MySQL Shell
|
1 |
$ sudo apt-get install mysql-server mysql-shell |
When the installation asks for it, set the password for the MySQL Server root user:

Wait for the installation to finish.
Start MySQL Shell with super user
Sudo is required because the next step requires root access to edit the MySQL configuration file. Type the password for root when prompted:
|
1 |
$ sudo -i mysqlsh |
To configure the host for InnoDB cluster usage, run the following command:
|
1 |
mysql-js> dba.configureLocalInstance(); |
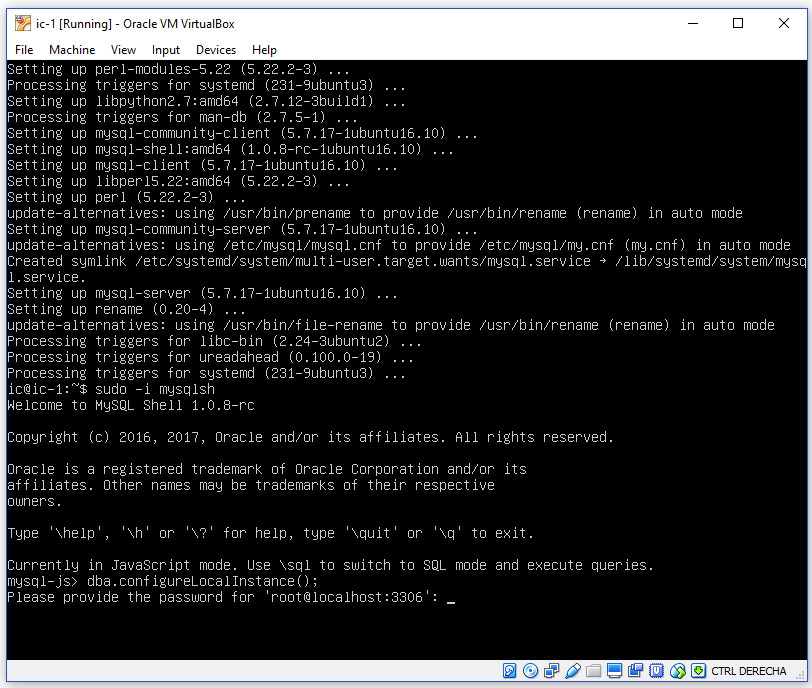
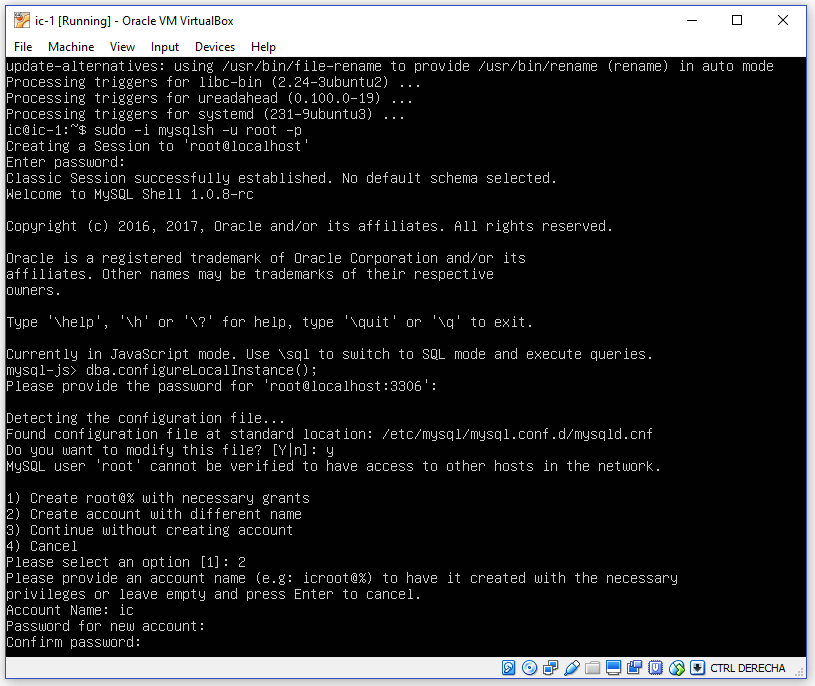
When prompted, type the password for the MySQL root user. MySQL Shell will find the default configuration file and ask for confirmation to modify it, type “Y”. Since root cannot do remote logins, you have three options to continue with the configuration: enable the remote connections for root, create a new user or not enable remote connections for root neither create a new user.
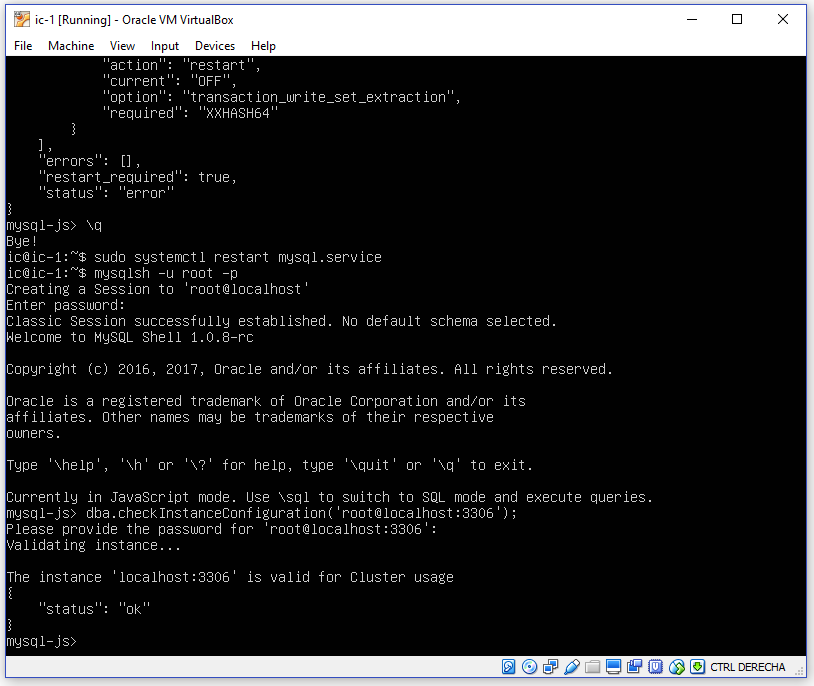
A report with the changes applied shall be displayed, and you will need to restart the MySQL Server service to apply them.

Quit the shell:
|
1 |
mysql-js> \q |
Restart the MySQL service:
|
1 |
$ sudo systemctl restart mysql.service |
Start the shell again, and run the following command to verify that the instance is ready for cluster usage. Type the password for MySQL root user when prompted:
|
1 2 |
$ mysqlsh mysql-js> dba.checkInstanceConfiguration('root@localhost:3306'); |
At this point the host is ready in the MySQL side, but it’s necessary a couple of more configuration on the host.
Ensure that the user created (‘ic’ in this case) is in the sudoers group.
|
1 |
$ sudo usermod -aG sudo ic |
Once the previous command finish successfully, then power off the virtual machine:
|
1 |
$ sudo shutdown now |
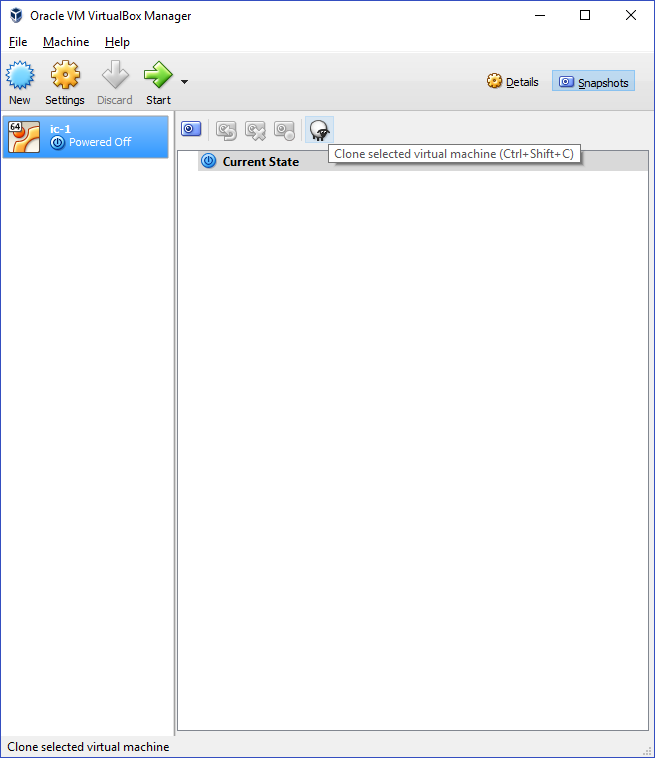
Cloning the virtual machine
The remaining two instances of the cluster will be a clone of the initial one. For that purpose, we will use the cloning capabilities of VirtualBox.
Select the virtual machine and click on the snapshots button (top-right). Then click on the “Sheep” icon:
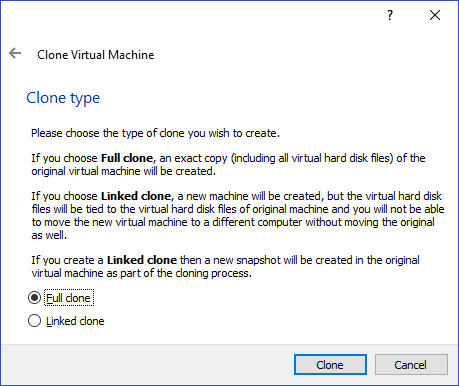
Type a name for the new virtual machine and check the option to reinitialize the MAC address. Then click “Next”

In the next screen select the clone type for the new virtual machine, in this blog post we used the “Full Clone” option, click on “Clone” to create the new virtual machine.
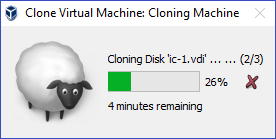
The clone process starts displaying a progress bar:
Repeat the process to finish with three virtual machines: ic-1, ic-2 and ic-3.

Before continuing, it’s necessary to change the hostname to avoid problems with the host mappings since we have three virtual machines with the same host name. Select the second virtual machine and click “Start”.

Type the user name and its password to log-in. Then execute the following command:
|
1 |
$ hostname |
You will see that the name of the virtual machine keeps being “ic-1”.

In order to persist the hostname, since it’s restarted everytime the virtual machine is restarted, we need to edit a couple of files.
Type the following command and change the name from “ic-1” to “ic-2” :
|
1 |
$ sudo nano /etc/hostname |

Press ctrl+o and the enter to save the file. Then press ctrl+x to close it. To continue, edit the following file with the command:
|
1 |
$ sudo nano /etc/hosts |
Change “ic-1” to “ic-2”.
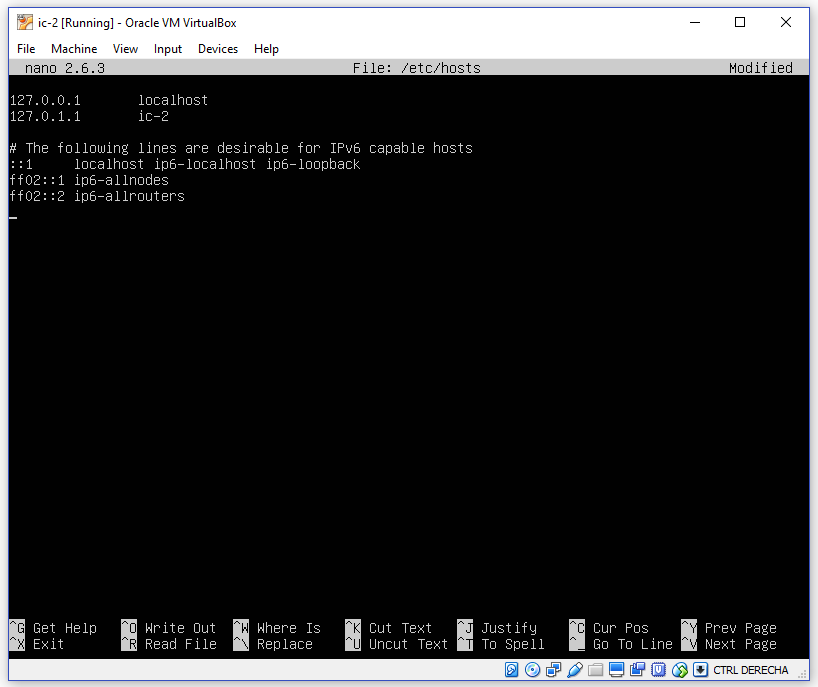
Press ctrl+o and the enter to save the file. Then press ctrl+x to close it.
To complete the change, restart the virtual machine:
|
1 |
$ sudo shutdown -r now |
When the virtual machine reboots, enter the user and password. Then run the following command to verify that the hostname is the new that we configured:
|
1 2 3 |
$ hostname $ sudo cat /etc/hostname $ sudo cat /etc/hosts |

Repeat the steps for the third virtual machine.
Configure Host
This is the last step that needs to be done to get the hosts ready.
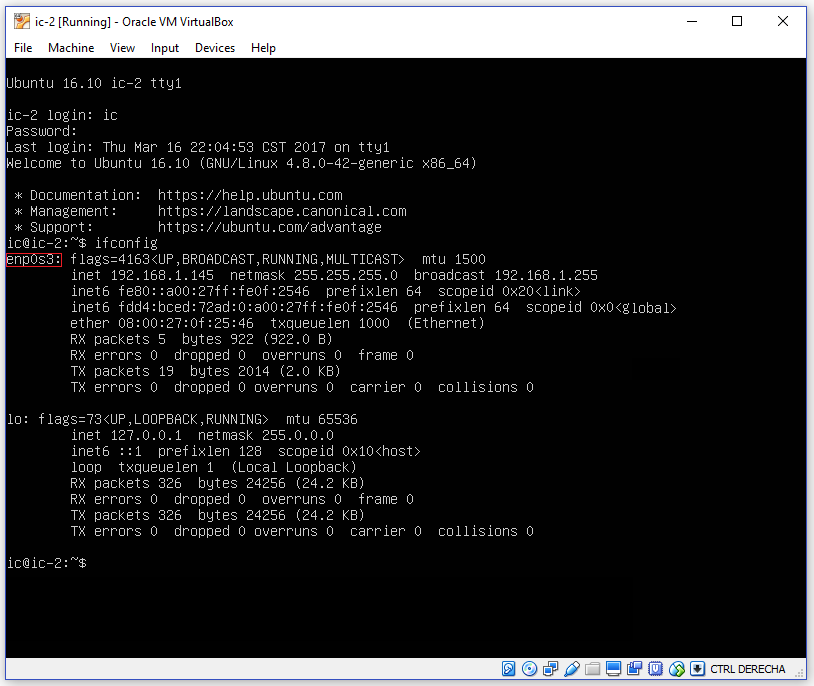
Set a static IP address to the host.
This is required to avoid problems with a dynamic IP assignation. Change “enp0s3” with the name oy tour network adapter used in the virtual machine. Before setting the IP, you can check the current IP assigned and use it as static, ensuring the value is valid and not in use. The first command displays the current network configuration and the second assigns the static IP. Example:
|
1 2 |
$ ifconfig $ sudo ifconfig enp0s3 192.168.1.201 netmask 255.255.255.0 |
If you are not sure about the network adapter name, when you run the “ifconfig” command you will see it.
Configure the host mapping
Open the hosts file and add the IP address and the name of the virtual machines.
|
1 |
$ sudo nano /etc/hosts |

Press ctrl+o and the enter to save the file. Then press ctrl+x to close it.
Repeat the process with the other virtual machines.
Conclusion
At this point, we have three virtual machines ready to be part of an InnoDB cluster. You’ve acquainted the knowledge on how to create the virtual machines and do the proper configuration to get them prepared for innoDB cluster usage.
By using virtual machines you can test the InnoDB cluster capabilities before moving to the configuration of real hosts.
On the next tutorial, you will find the process to create a cluster and use MySQL Router to map all the data requests.
See you in the next blog post!