MySQL Cluster 7.3 has just been declared Generally Available (and with it the new MySQL Cluster Auto-Installer) – download it from here.
Deploying a well configured cluster has just got a lot easier! Oracle have released a new auto-installer/configurator for MySQL Cluster that makes the processes extremely simple while making sure that the cluster is well configured for your application. A single command launches the web-based wizard which then steps you through configuring the cluster; to keep things even simpler, it will automatically detect the resources on your target machines and use these results together with the type of workload you specify in order to determine values for the key configuration parameters.
For a broader view of what is being released – check out this MySQL Cluster 7.3 GA article.
Tutorial Video
Before going through the detailed steps, here’s a demonstration of the auto-installer in action (note that this is actually an earlier version but the idea is the same)…
Downloading and running the wizard
The software can be downloaded as part of the MySQL Cluster package from the MySQL Cluster Download page. To run on Windows, just double click setup.bat – note that if you installed from the MSI and didn’t change the install directory then this will be located somewhere like C:Program Files (x86)MySQLMySQL Cluster 7.3. On Linux, just run ndb_setup from the bin folder.
If you launch the installer from a desktop environment then the first page of the wizard will automatically be opened in your web browser, if not then just browse to the URL that is displayed on the command line.
Creating your cluster

You also get to specify what “type” of cluster you want; if you’re experimenting for the first time then it’s probably safest to stick with “Simple testing” but for a production system you’d want to specify the application type and query profile, i.e. write-intensive.
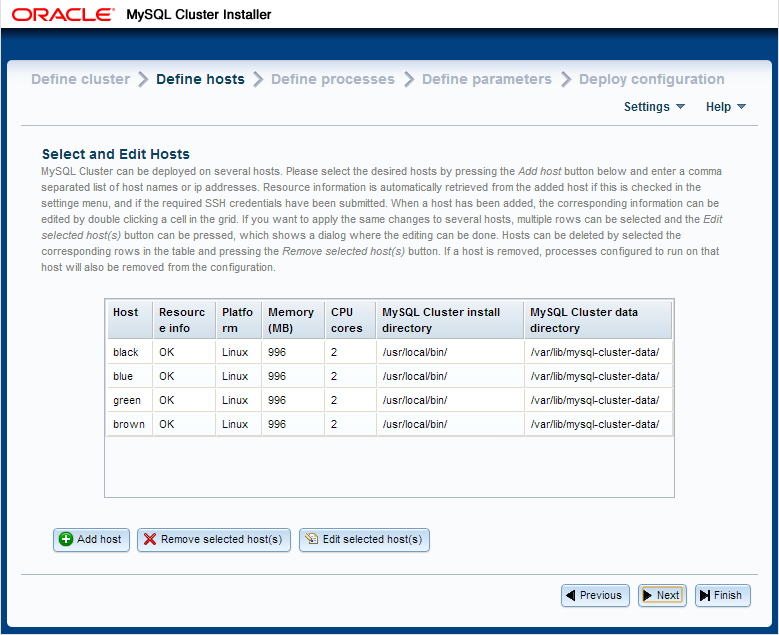
It’s also on this page that you can specify where the MySQL Cluster software is stored on each of the hosts (if the defaults aren’t correct) – this should be the path to where you extracted the MySQL Cluster tar-ball file – as well as where the data (and configuration files) should be stored. You can just overwrite the values or select multiple rows and hit the “edit” button.
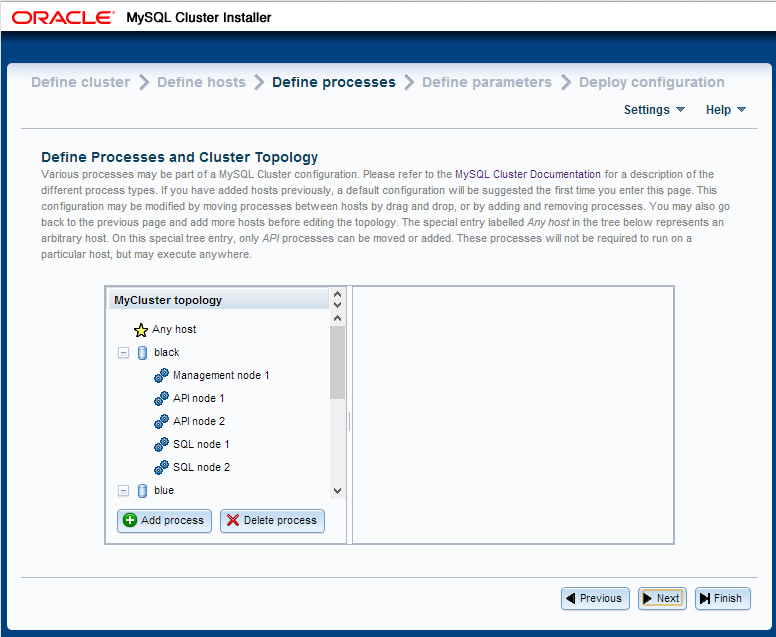
Alternatively, you can add extra nodes, move nodes from one host to another (just drag and drop), delete nodes or change a node from one type to another.


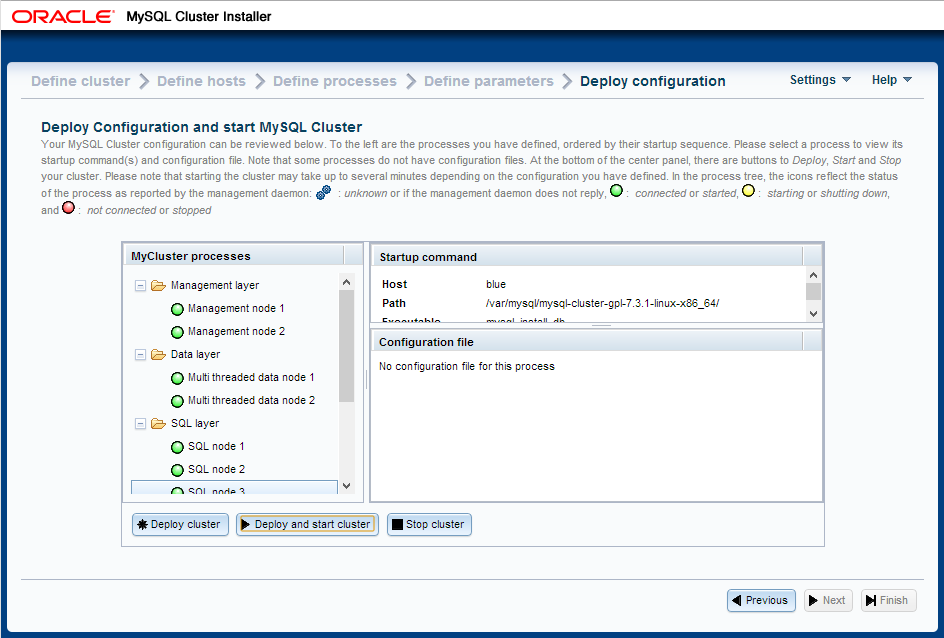
If you prefer or need to start the processes manually, this page also shows you the commands that you’d need to run (as well as the configuration files if you need to create them manually).
A traffic light display shows the various Cluster nodes (processes) coming into service.
As always it would be great to hear some feedback especially if you’ve ideas on improving it or if you hit any problems.