In this tutorial, we are going to guide you through the entire process of creating a 3 node InnoDB cluster in Oracle Public Cloud (OPC). We will address each of the steps, from the initial configuration and setup of the OPC IaaS resources to the InnoDB cluster creation and setup.
Setting up Three MySQL Instances on OPC
Before we can get started, we have to create three MySQL instances on OPC.
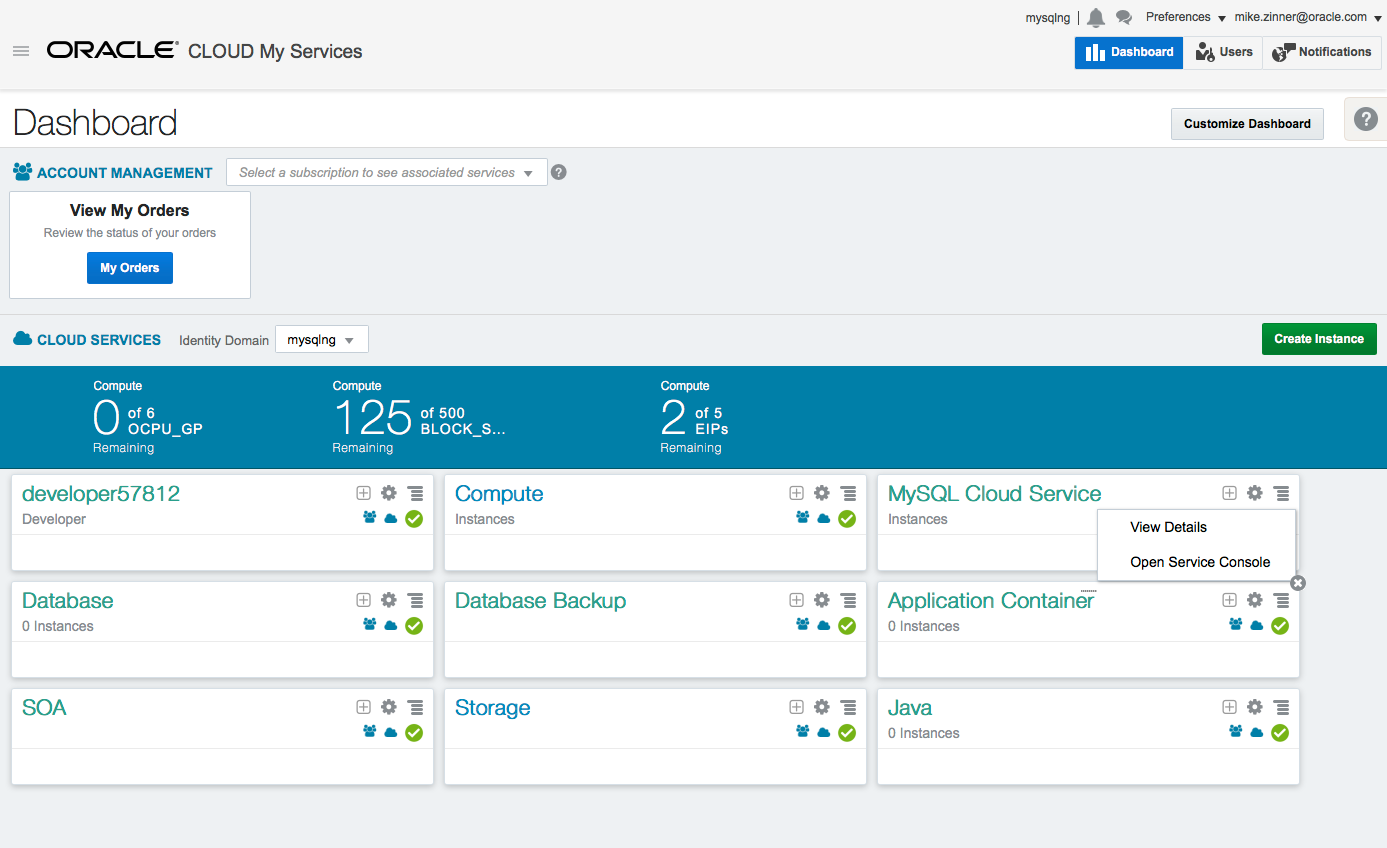
Log into the Oracle Cloud Dashboard and open the MySQL Cloud Service Console.
On the Oracle MySQL Cloud Service Console press [Create Service] to add a new MySQL Instance. For this tutorial, we will use 3 MySQL instances with the respective names of ic01, ic02, ic03. Enter a Service Description and click [Next >].

On the next screen, we select the virtual machine type–which will run Oracle Linux 6 as the OS–provide our SSH Public Key–so that we’re able to access the machine later on–and we specify some basic MySQL configuration details.
Note: For this tutorial we will use root as Administrator User. Please ensure to use the same Administration Password on all 3 instances.

It will take a few minutes to create the virtual machine. We can use that time to start creating the other two MySQL service instances as well.
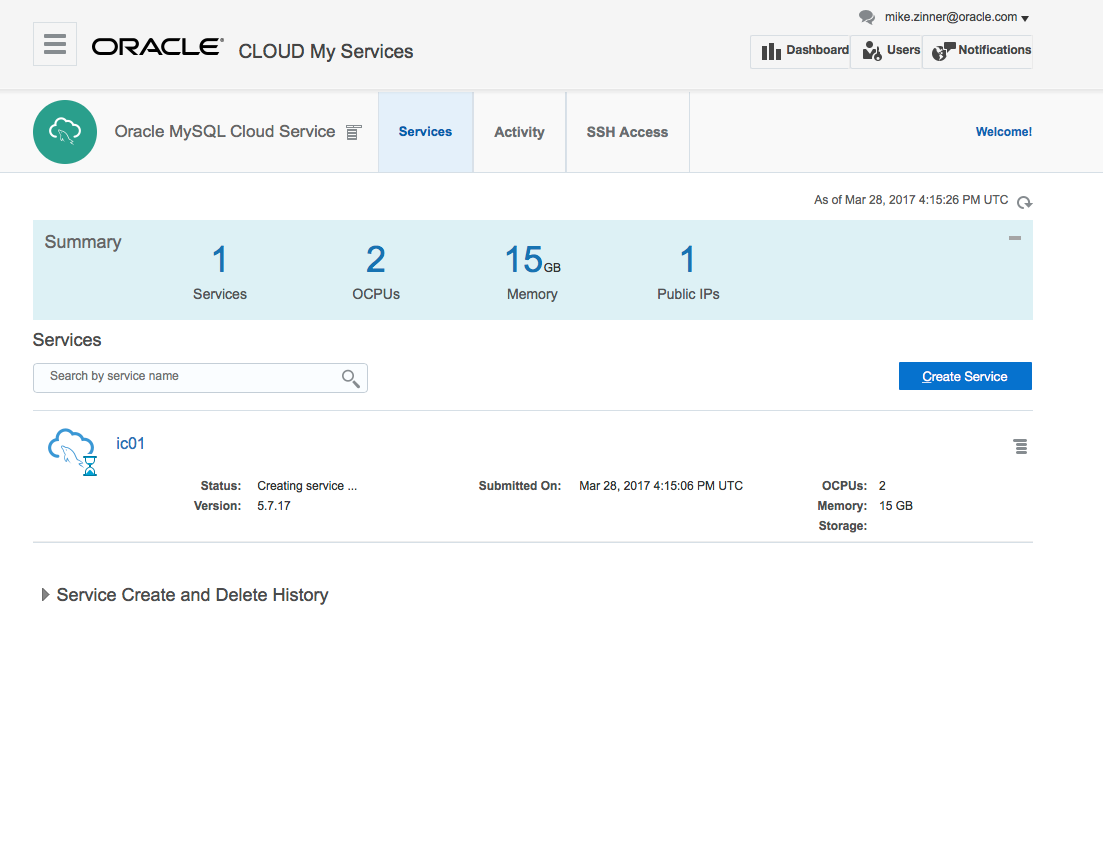
After the MySQL service instance is available, we can click the instance name–ic01–to get more information about the MySQL instance. Please make sure to note the Public IP address as we will need to update the local hosts file with this information.

In this case, the MySQL service instance is running on 140.86.13.239. Repeat this for all instances and then update your local /etc/hosts file. Open the file with your editor of choice–I’ll use nano:
|
1 |
sudo nano /etc/hosts |
And add entries for all three of your MySQL service instances, specifying their hostnames and IP addresses:
|
1 2 3 |
140.86.32.38 ic03-mysql-1 140.86.35.55 ic02-mysql-1 140.86.13.239 ic01-mysql-1 |
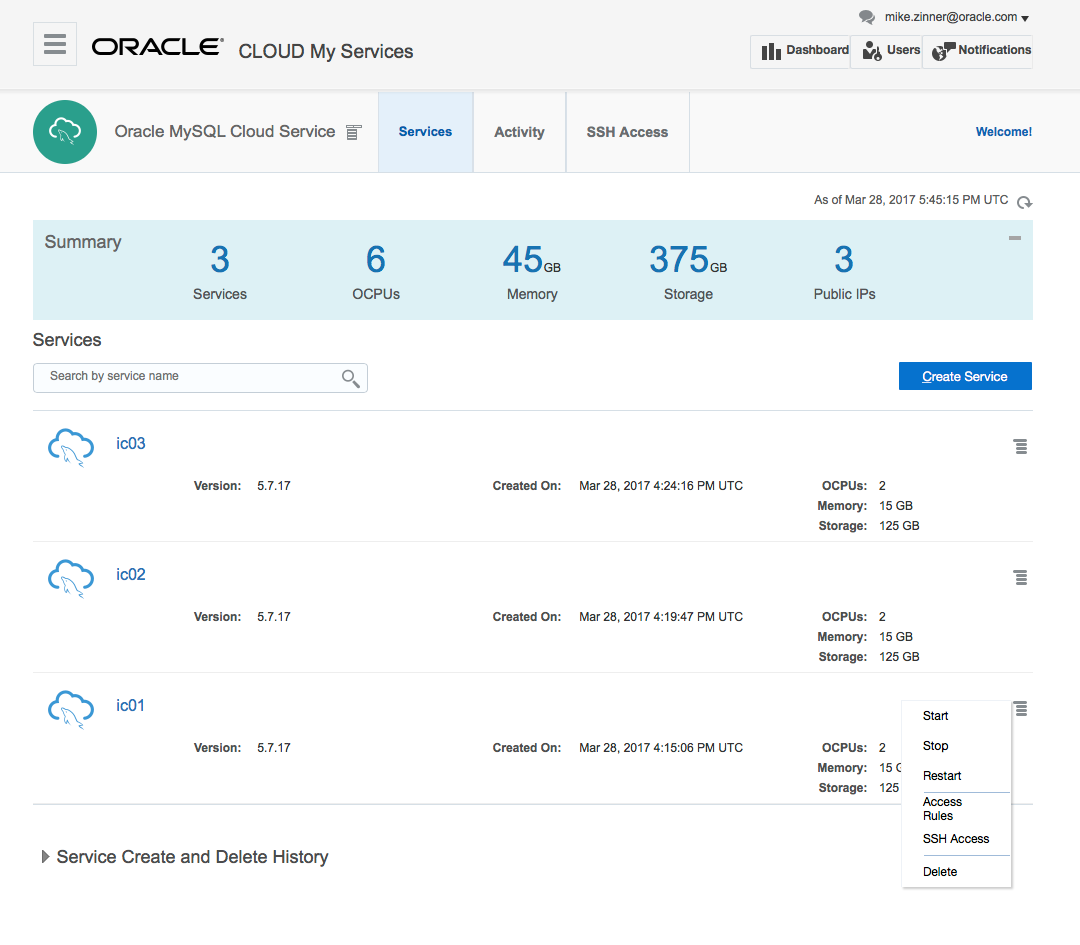
After this has been completed, we can update the Access Rules to allow the MySQL instances to talk to each other within the OPC network and enable public access to the machines (if desired). Click the context menu and select [Access Rules].
Note: Please ensure to update/create the rules on all 3 instances.
On the Access Rules screen click [Create Rule] to bring up the Create Access Rule dialog.
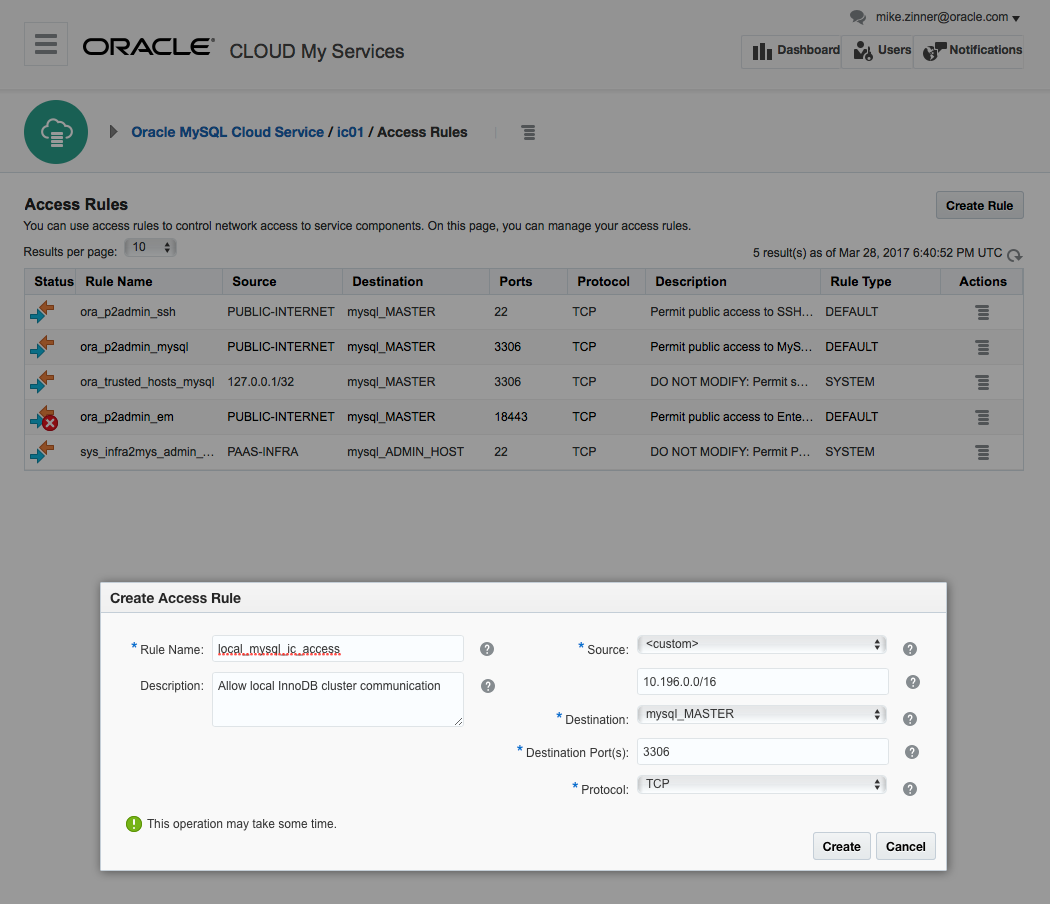
Create three new rules and enable public access to the machines:
Create Access Rule #1
Rule name: local_mysql_ic_access
Description: Allow local InnoDB cluster communication
Source: <custom> 10.196.0.0/16
Destination: mysql_MASTER
Destination Port(s): 3306
Create Access Rule #2
Rule name: local_mysql_ic_access2
Description: Allow local InnoDB cluster communication
Source: <custom> 10.196.0.0/16
Destination: mysql_MASTER
Destination Port(s): 13306
Create Access Rule #3
Rule name: mysql_p2admin_x
Description: Permit public access to MySQL X Protocol Port
Source: PUBLIC-INTERNET
Destination: mysql_MASTER
Destination Port(s): 33060
Enable Access Rule for public 3306 access
Rule Name: ora_p2admin_mysql
Note: Enabling the public access to the port 3306 has some security implications. Please ensure to properly secure your connections before you do it.
After these steps, you have three instances that are ready to be prepared for InnoDB cluster usage from an SSH session.
Preparing the MySQL Service Instances for InnoDB Cluster Usage
In the previous section, we created the MySQL Cloud Service instances within OPC and uploaded our public SSH key. We also added the OPC instance names to our local hosts file so we can access them by (short) name instead of IP. Now we can access our MySQL service instances in OPC via SSH on our local machine.
Open a terminal and type the following to connect to the first instance:
|
1 |
ssh opc@ic01-mysql-1 |
If everything is configured correctly you will see the following welcome message:

Installing Python 2.7
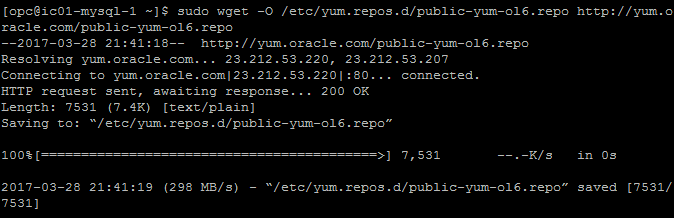
Since Python is required by MySQL Shell, it needs to be installed before continuing. In this case, Python is going to be installed using the Software Collection Library 2.3 for Oracle Linux. Use the following command to download the yum repository file that includes an entry for the Software Collections repository:
|
1 |
sudo wget -O /etc/yum.repos.d/public-yum-ol6.repo http://yum.oracle.com/public-yum-ol6.repo |
An easy way to enable repositories is to use the yum-utils package, which is used in this tutorial. Since it’s not installed by default, I will install it with the following command:
|
1 |
sudo yum install yum-utils |
Once the installation of yum-utils package finishes, enable the Software Collection repository:
|
1 |
sudo yum-config-manager --enable ol6_software_collections |
To continue, install the Software Collection Library Utility and Python 2.7:
|
1 |
sudo yum install scl-utils python27 |
Now, enable the use of Python 2.7:
|
1 |
scl enable python27 -- bash |
Installing the MySQL Shell
To install MySQL Shell first we need to install the official MySQL yum repository. Run the following command to install the yum repository:
|
1 |
sudo rpm -Uvh https://dev.mysql.com/get/mysql57-community-release-el6-10.noarch.rpm |
Type the following command in the terminal to install MySQL Shell:
|
1 |
sudo yum install mysql-shell |
Preparing the MySQL Instances for InnoDB Cluster Usage
First, we need to switch to the “oracle” user and then start MySQL Shell specifying that Python 2.7 should be enabled for it:
|
1 2 |
sudo su - oracle scl enable python27 -- mysqlsh --uri root@localhost:3306 |

We switch to the “oracle” user because the MySQL Service (mysqld) is only exposed to the “oracle” user, and it is not in the PATH for the “opc” user. We also specified that we want to connect to the localhost in the port 3306 using root.
Since the OPC MySQL service instance uses the Password Validation Plugin, and its default could potentially be too strict for the auto-generated Router bootstrap password, we will avoid possible issues by lowering the password policy a level with the following on each instance using MySQL Shell:
|
1 2 3 |
mysql-js> \sql mysql-sql> SET GLOBAL validate_password_policy=0; mysql-sql> \js |
Other important thing to verify, it’s that all the Server must have a unique server_id value. If you are not sure what is the server_id of your MySQL Server run the following command:
|
1 2 3 |
mysql-js> \sql mysql-sql> SELECT @@server_id; mysql-sql> \js |
Verify that all your instances have a different server_id value. Run the following command in case you need to change it:
|
1 2 3 |
mysql-js> \sql mysql-sql> SET GLOBAL server_id=#; mysql-sql> \js |
Where # is the new id you want to set. A valid value it’s an integer in the range from 1 to 4294967295.
Next, we configure the local instance by calling the following function, typing the password for root user when prompted:
|
1 |
mysql-js> dba.configureLocalInstance(); |
Note: You must run the command locally on each instance.
The MySQL configuration file (my.cnf) needs to be specified and is found in /u01/bin/mysql/my.cnf. If you used a different Administrative User other than “root”, MySQL Shell gives you the option to create a new Administrative User for the InnoDB cluster when you are configuring the host using dba.configureLocalInstance(), but since we were using “root” for this tutorial, no new user needs to be created.
Then you will see a report with the changes made by MySQL Shell and a message saying that you need to restart the MySQL service instance to apply them:

To restart the MySQL server, first quit the MySQL Shell:
|
1 |
mysql-js>\q |
Then run the following command still using the “oracle” user to stop the MySQL Server instance:
|
1 |
mysqladmin shutdown |
Then, start the MySQL server again:
|
1 |
cd $MYSQL_HOME && bin/mysqld_safe & |
Once the service is running again, start MySQL Shell specifying that Python 2.7 should be enabled for it:
|
1 |
scl enable python27 -- mysqlsh |
Then run the following command to verify that the host us ready for cluster usage:
|
1 |
mysql-js> dba.checkInstanceConfiguration('root@localhost:3306'); |

Creating the InnoDB Cluster
To create the InnoDB cluster we will run the shell on our local machine using the root user, and specify the port where MySQL is running:
|
1 |
$ mysqlsh root@ic01-mysql-1:3306 |

Remember to configure your local /etc/hosts file to be able to use the short hostname for a remote connection instead of the IP address
In the following command pay attention to the ipWhitelist option parameter. Since each host has its own network, it’s necessary to specify the range of IPs that are going to be permitted to connect to the cluster. The variable that stores the value by default is set to “AUTOMATIC”, which permits connections just from private subnetworks on the host. The first addres is the range of the ip’s of our hosts, the second ip is the localhost. You can add multiple IP ranges separating them by a comma. The number after the slash is the number of network bits when using CIDR values. The cluster creation is assigned to a variable for later usage:
|
1 |
mysql-js> var cluster = dba.createCluster('myCluster', {ipWhitelist:'10.196.0.0/16,127.0.0.1/8'}); |
Note: be sure to set the ip that matches your hosts source range ip’s. (refer to the “source” field set in the Access Rules creation).
A couple of messages with information about the cluster creation and the function required to add instances to the cluster is will appear once the cluster is created.

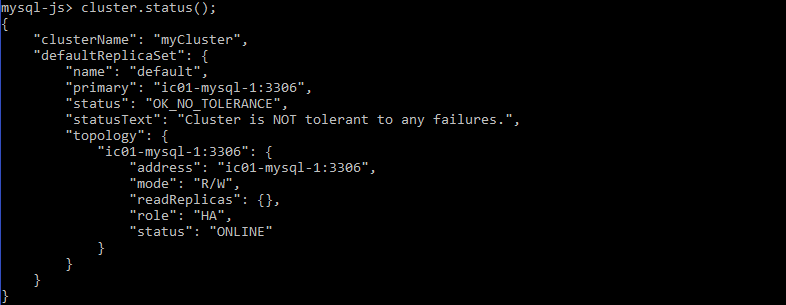
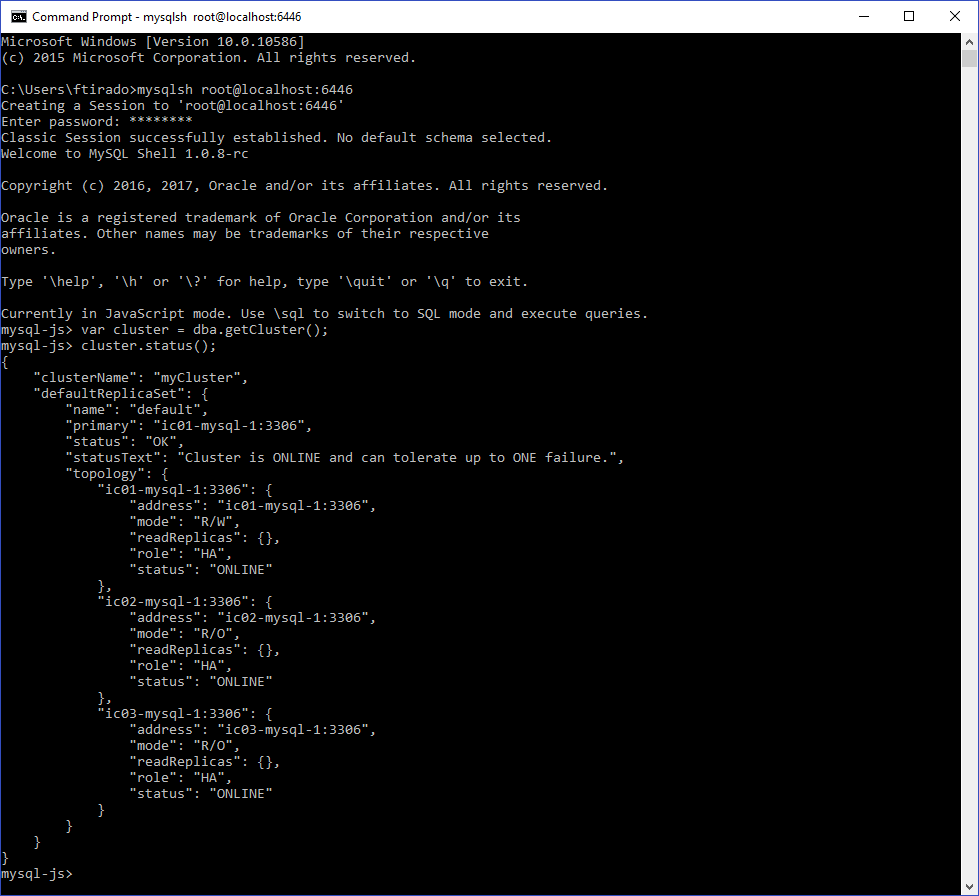
Then we can verify the status of the cluster with the following command:
|
1 |
mysql-js> cluster.status(); |
Adding Instances to the InnoDB Cluster
Now it’s time to add instances to the cluster. Run the following function to add the second instance that is already configured. For the reason explained above, the optional parameter ipWhitelist is specified as well:
|
1 |
mysql-js> cluster.addInstance('root@ic02-mysql-1:3306', {ipWhitelist:'10.196.0.0/16,127.0.0.1/8'}); |

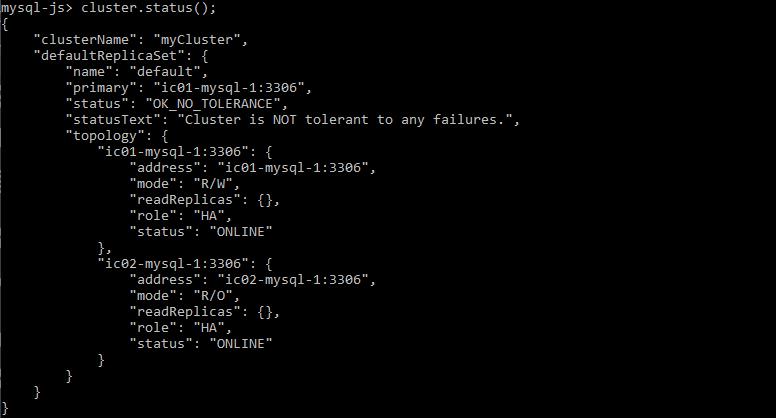
Run the following command to verify the status of our instance in the cluster:
|
1 |
mysql-js> cluster.status(); |
Then add the third instance:
|
1 |
mysql-js> cluster.addInstance('root@ic03-mysql-1:3306', {ipWhitelist:'10.196.0.0/16,127.0.0.1/8'}); |

And run again the command to verify the status of our cluster:
|
1 |
mysql-js> cluster.status(); |

Persist the Cluster Configuration
In order to persist the cluster configuration on each instance–so that when a restart happens the instances automatically rejoin the cluster–we must use dba.configureLocalInstance() again on each instance. That command will update the local my.cnf file with the parameters necessary to automatically rejoin to the cluster.
To do this, run the following command locally on each instance:
|
1 |
mysql-js> dba.configureLocalInstance(); |
Configure a MySQL Router
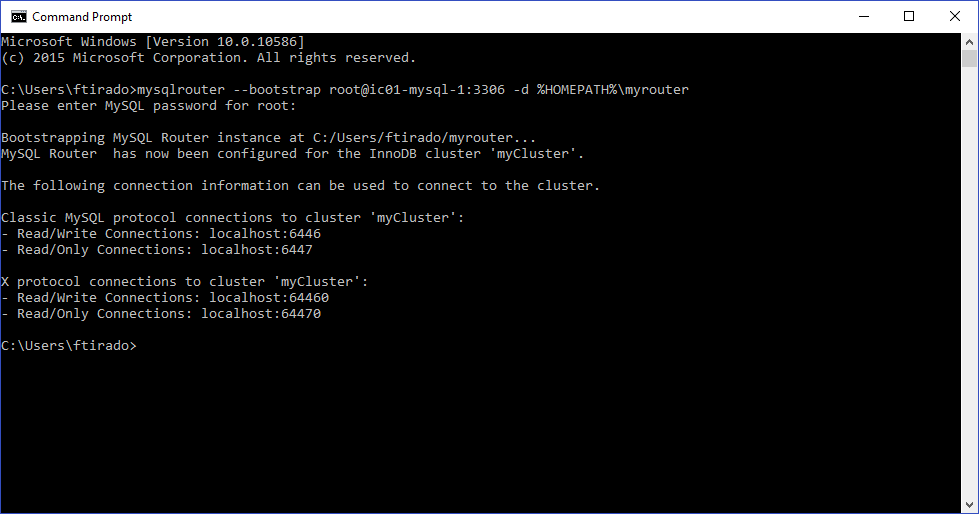
The next step is to bootstrap our cluster. We assume that you already have MySQL Router 2.1.3+ installed. Open a terminal or a command prompt and type the following command:
Windows:
|
1 |
mysqlrouter --bootstrap root@ic01-mysql-1:3306 -d %HOMEPATH%\myrouter |
Linux:
|
1 |
mysqlrouter --bootstrap root@ic01-mysql-1:3306 -d myrouter |
Starting the MySQL Router
Windows:
|
1 |
start /B mysqlrouter -c %HOMEPATH%\myrouter\mysqlrouter.conf |
Linux (assuming that myrouter directory it’s on the home path):
|
1 |
myrouter/start.sh |
Testing the InnoDB Cluster
Now we will demonstrate how the failover works.
Start MySQL Shell and connect locally using the MySQL Router port that points to our remote cluster:
|
1 |
mysqlsh root@localhost:6446 |
Then get the cluster handle with the following function:
|
1 |
mysql-js> var cluster = dba.getCluster(); |
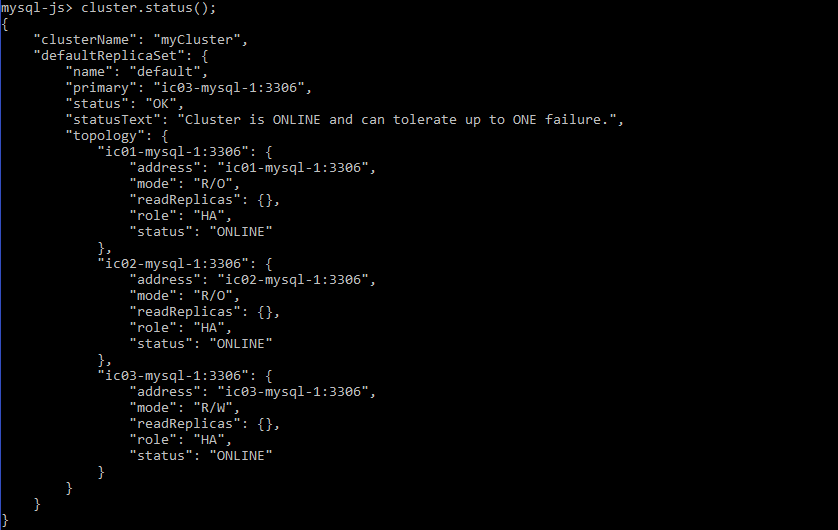
And then, display the status of the cluster:
|
1 |
mysql-js> cluster.status(); |
You can see which instance is currently the PRIMARY by looking for the instance marked as having mode:”R/W”. Then you can connect remotely to that instance and stop the MySQL service:
|
1 |
su oracle -c 'mysqladmin shutdown' |

Once the MySQL service is stopped, check the cluster status again:
|
1 |
mysql-js> cluster.status(); |
You will see a message saying that the connection to MySQL was lost during query.
![]()
To reconnect, run the following command:
|
1 |
mysql-js> shell.connect('root@localhost:6446'); |

Then execute the function to verify the cluster status again:
|
1 |
mysql-js> cluster.status(); |

Notice that the instance ic01-mysql-1 has a “MISSING” status and one of the other instances has taken the PRIMARY (or “master”) role changing its mode from “R/O” to “R/W”.
Start the MySQL service again on the remote host connection:
|
1 |
cd $MYSQL_HOME; bin/mysqld_safe & |
Check the cluster status again:
|
1 |
mysql-js> cluster.status(); |
Notice that the instance ico1-mysql-1 is back “ONLINE” but now it has a SECONDARY (or “slave”) role with its mode set to “R/O”.
Conclusion
You have now acquired the basic knowledge to properly create and configure a cluster using Oracle Public Cloud and MySQL Cloud Service instances, including how to bootstrap a remote cluster so that you can access it locally. This scenario is useful when you don’t want to expose the servers where MySQL Server is running but instead provide the IP address of another server which just handles the application traffic.
There’s a lot of other functionalities that we still want to share with you, so stay tuned for Part II of this series!
If you have any questions about the basic setup described here, please let us know here in the comments. As always, thank you for using MySQL!