This tutorial shows how to read information from MySQL Sakila database in an ASP.NET Core application using Connector/NET Core to explore the possibility to run this application on any .NET Core supported environment as Windows, Linux, and Mac.
Pre-requisites:
- MySQL Server 5.7
- .NET Core 1.1 environment installed
https://www.microsoft.com/net/core - Visual Studio 2015 or Visual Studio Code
- Sakila sample database
http://dev.mysql.com/doc/sakila/en/sakila-installation.html
Windows and Visual Studio 2015
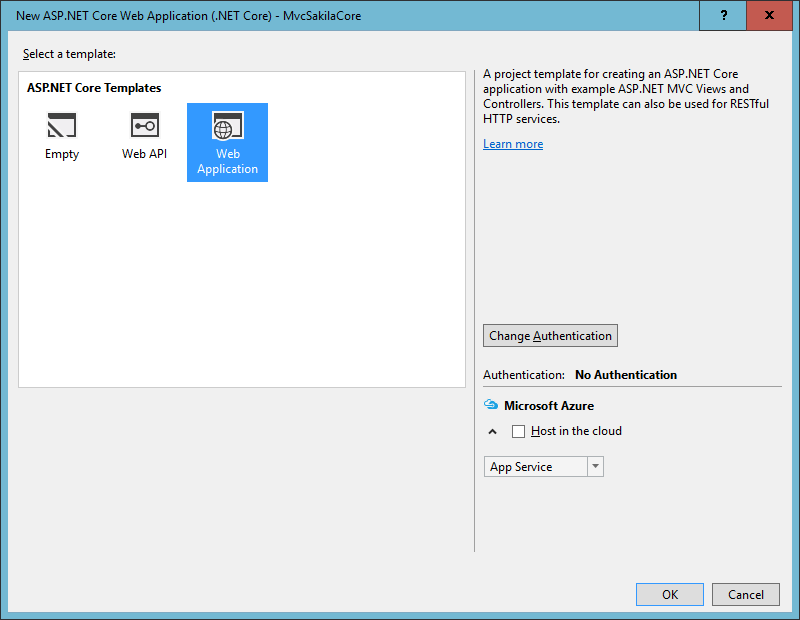
The first step is to create an ASP.NET Core Web Application (.NET Core) type project and name it MvcSakilaCore
Note: the project name should not contain spaces

Select Web Application template and No Authentication:
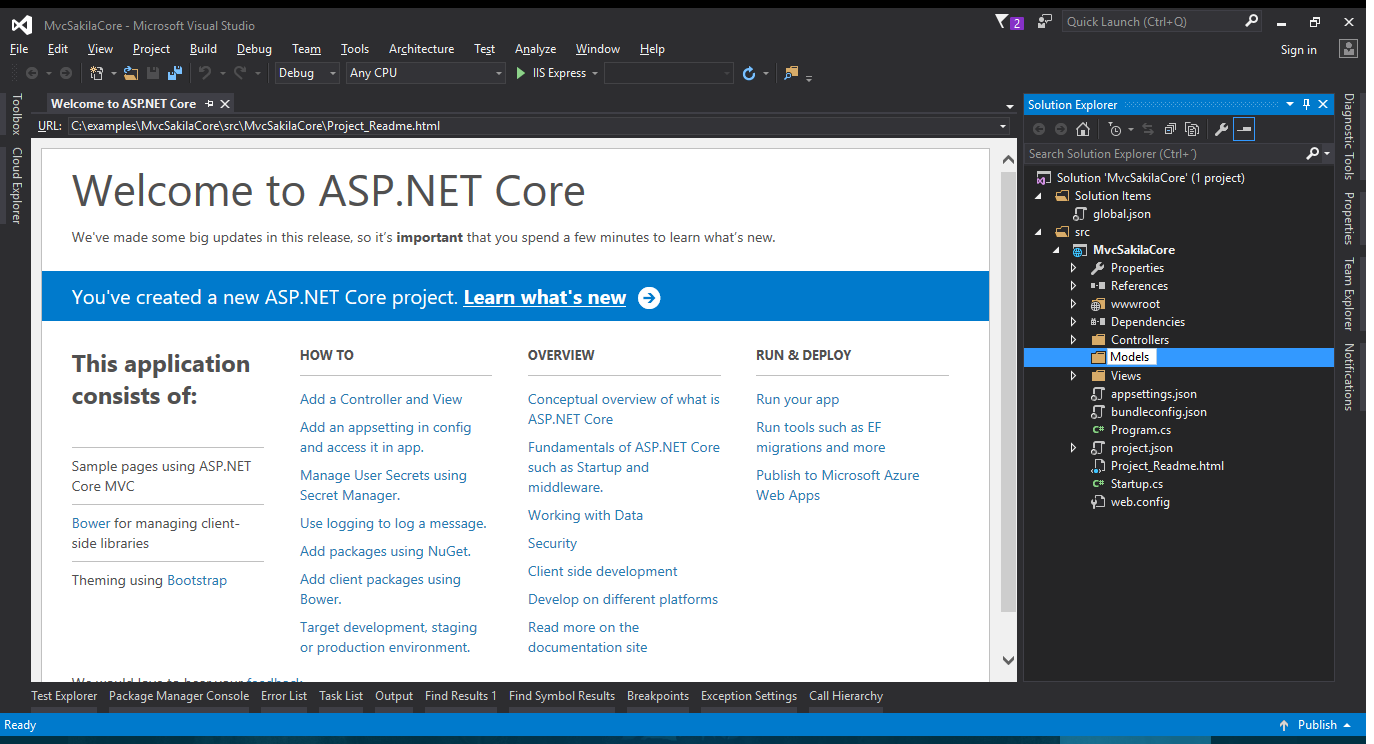
The new project will be created:

Press F5 to run the application:

Stop the running application to add some code.
Creating the data model
Create a new folder named “Models” where it will store the database access:
Installing MySQL Connector/NET Core package
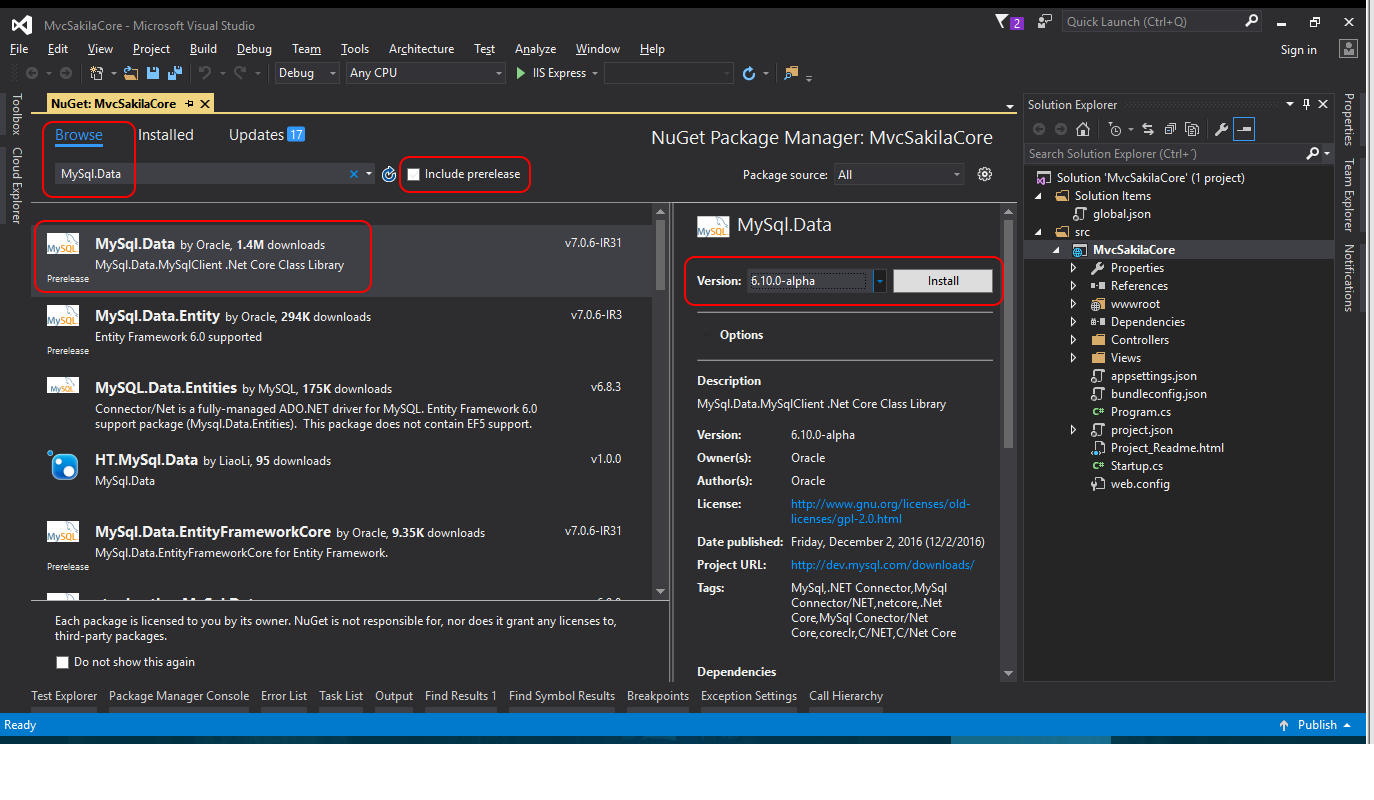
In order to use MySQL Connector/NET it’s required to add its nuget package.
In Solution Explorer, right-click MvcSakilaCore project > Manage NuGet Packages…
In the NuGet dialog, Browse “MySql.Data” package using version 6.10.0 or above:
Adding the connection string
Add your connection string in the appsettings.json file:

Adding data model classes
For this example a Film class will be used. It contains the database fields as properties we want to show in our application.
Add a new class named “Film” inside Models folder:
using Microsoft.AspNetCore.Http;
using Microsoft.Extensions.Configuration;
using MySql.Data.MySqlClient;
using System;
using System.Collections.Generic;
using System.Linq;
using System.Threading.Tasks;

namespace MvcSakilaCore.Models
{
  public class Film
  {
    private SakilaContext context;

    public int FilmId { get; set; }

    public string Title { get; set; }

    public string Description { get; set; }

    public int ReleaseYear { get; set; }

    public int Length { get; set; }

    public string Rating { get; set; }
  }
}
Create a new SakilaContext class that will contains the connections and Sakila database entities:
using MySql.Data.MySqlClient;
using System;
using System.Collections.Generic;
using System.Linq;
using System.Threading.Tasks;
using Microsoft.Extensions.DependencyInjection;

namespace MvcSakilaCore.Models
{
  public class SakilaContext
  {
    public string ConnectionString { get; set; }

    public SakilaContext(string connectionString)
    {
      this.ConnectionString = connectionString;
    }

    private MySqlConnection GetConnection()
    {
      return new MySqlConnection(ConnectionString);
    }

    public List<Film> GetAllFilms()
    {
      List<Film> list = new List<Film>();

      using (MySqlConnection conn = GetConnection())
      {
        conn.Open();
        MySqlCommand cmd = new MySqlCommand("SELECT * FROM film", conn);
        using (MySqlDataReader reader = cmd.ExecuteReader())
        {
          while (reader.Read())
          {
            list.Add(new Film()
            {
              FilmId = reader.GetInt32("film_id"),
              Title = reader.GetString("title"),
              Description = reader.GetString("description"),
              ReleaseYear = reader.GetInt32("release_year"),
              Length = reader.GetInt32("length"),
              Rating = reader.GetString("rating")
            });
          }
        }
      }

      return list;
    }
  }
}
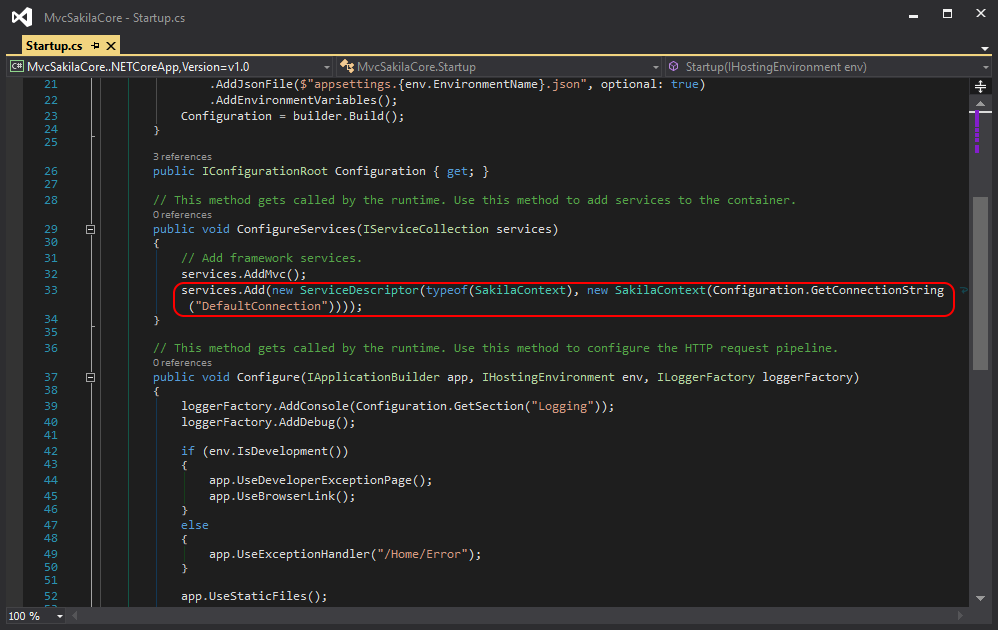
In order to be able to use our SakilaContext it’s required to register the instance as a service in our application. To do this add the code line in the Startup.cs file:
Adding Film Controller
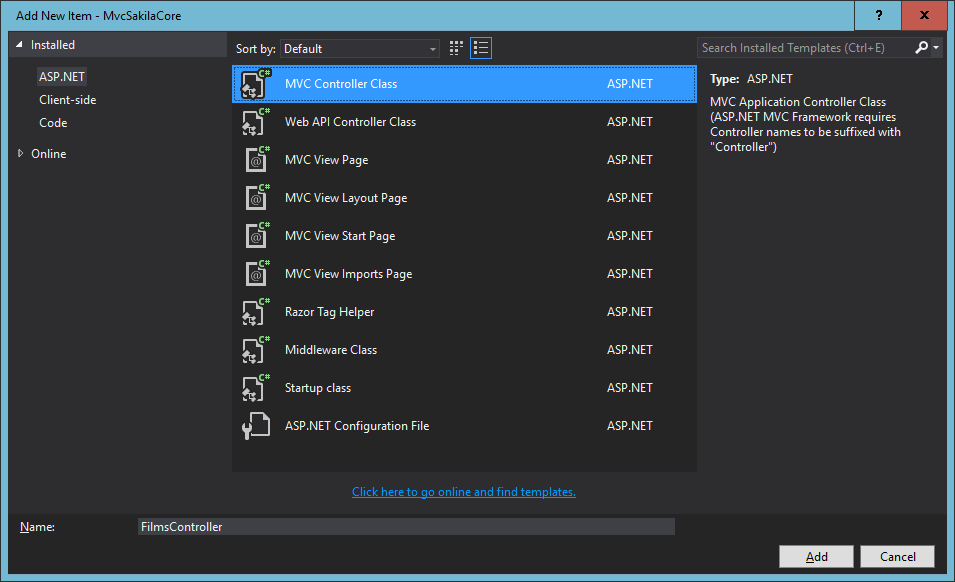
In Solution Explorer, right-click Controllers > Add > New Item… > MVC Controller Class
Name the controller FilmsController:
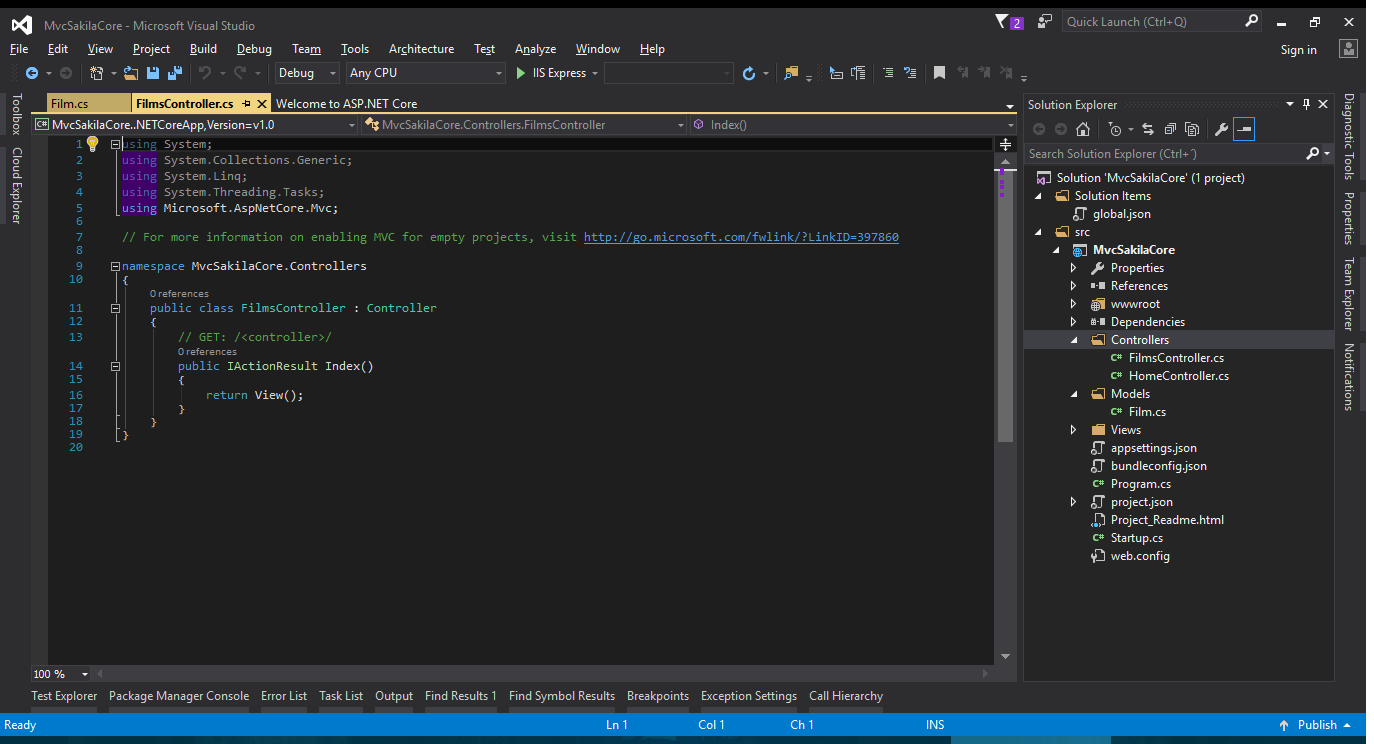
Change the FilmsController code to this:
using System;
using System.Collections.Generic;
using System.Linq;
using System.Threading.Tasks;
using Microsoft.AspNetCore.Mvc;
using MvcSakilaCore.Models;

// For more information on enabling MVC for empty projects, visit http://go.microsoft.com/fwlink/?LinkID=397860

namespace MvcSakilaCore.Controllers
{
  public class FilmsController : Controller
  {
    // GET: /<controller>/
    public IActionResult Index()
    {
      SakilaContext context = HttpContext.RequestServices.GetService(typeof(MvcSakilaCore.Models.SakilaContext)) as SakilaContext;

      return View(context.GetAllFilms());
    }
  }
}
Creating the Films View
Start creating the Films folder under Views:
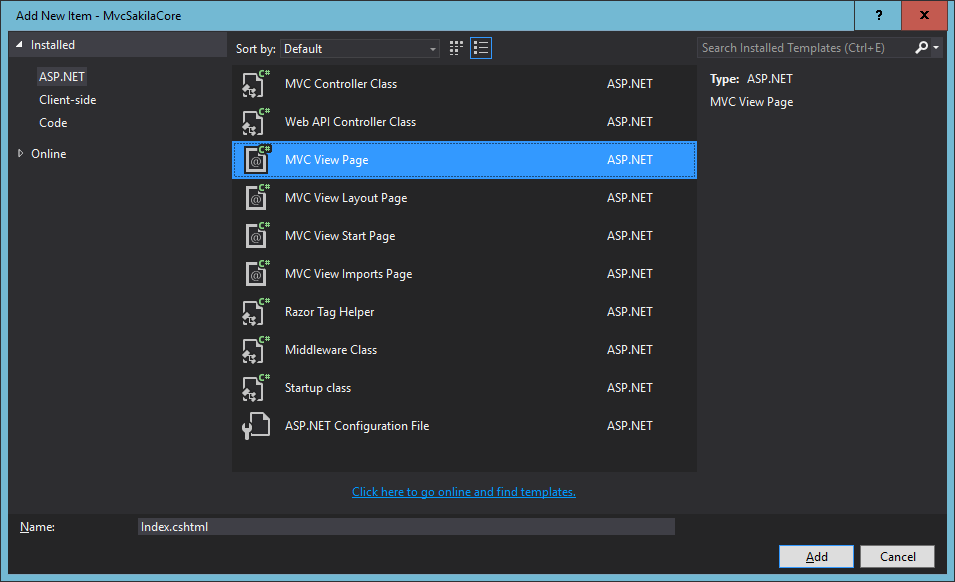
In Solution Explorer, right click Views > Films > Add > New Item… > ASP.NET > MVC View Page
Add the following code into the new Index.cshtml view file:
@model IEnumerable<MvcSakilaCore.Models.Film>
@{
  ViewBag.Title = "Films";
}
<h2>Films</h2>
<table class="table">
  <tr>
    <th>Film ID</th>
    <th>Title</th>
    <th>Description</th>
    <th>Release Year</th>
    <th>Length</th>
    <th>Rating</th>
  </tr>
  @foreach (var item in Model)
  {
    <tr>
      <td>
        @Html.DisplayFor(modelItem => item.FilmId)
      </td>
      <td>
        @Html.DisplayFor(modelItem => item.Title)
      </td>
      <td>
        @Html.DisplayFor(modelItem => item.Description)
      </td>
      <td>
        @Html.DisplayFor(modelItem => item.ReleaseYear)
      </td>
      <td>
        @Html.DisplayFor(modelItem => item.Length)
      </td>
      <td>
        @Html.DisplayFor(modelItem => item.Rating)
      </td>
    </tr>
  }
</table>
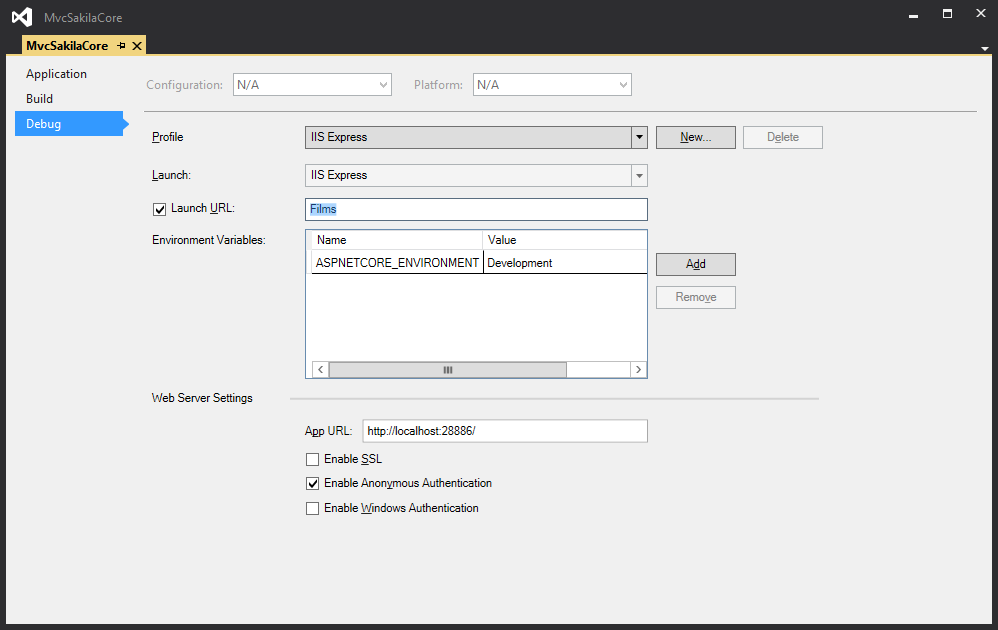
Before run the application, add the Films path to the running url.
In Solution Explorer, right click MvcSakilaCore > Properties > Debug > Launch URL > Films:
Run the application (press F5) and the Films list should be displayed:
